
How to run OpenVPN and Pi-hole using Docker in a VPS

This is a tutorial on how to run OpenVPN and Pi-hole in Docker with zero experience. Since Docker is a beast with its documentations and there are countless tutorials out there, I will be skipping a lot of things. It is your responsibility to learn afterwards.
Table of Contents
- Requirements
- Setting Up – DigitalOcean
- Setting Up – Freenom
- Setting Up – OpenVPN
- Setting Up – Authentications
- The YAML
- Pi-hole
- OpenVPN
- Connecting – Computer
- Connecting – Phone
- Connecting – Linux
- Conclusion
Requirements
- VPS – For this example, I will be using DigitalOcean. You can use any server you want as long as it can run Docker. I am currently hosted with BuyVM.
- Domain – If don’t have one, you can register one for free at Freenom.
Setting Up – DigitalOcean
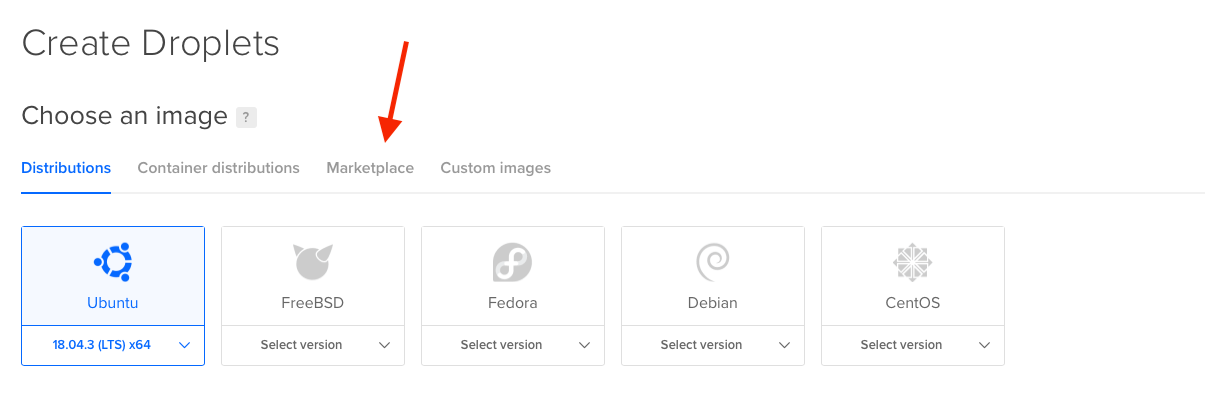
Go to the Create Droplets page and click on Marketplace tab. We’re gonna use a custom image to speed things up.

By using the Docker image, our VPS comes pre-installed with Docker and docker-compose. You can leave the other settings as default or modify location, that’s up to you.

Copy the IP address so we can paste it into the DNS of our new domain.
Setting Up – Freenom
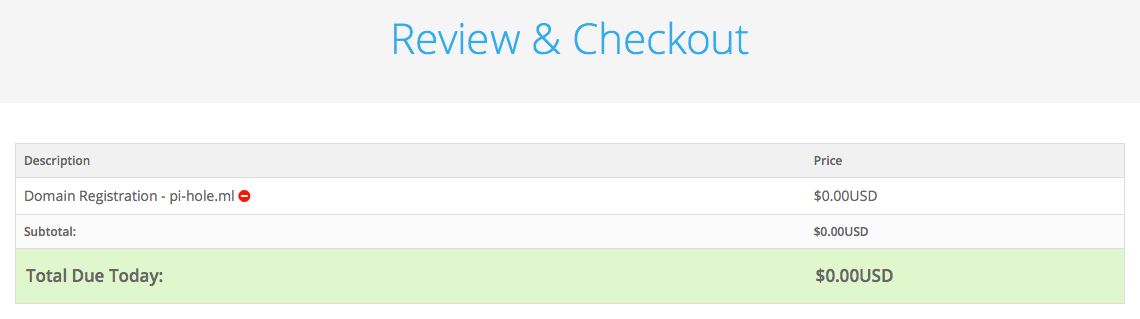
Register your free domain, for this article, I registered a temporary domain pi-hole.ml for 1 month.
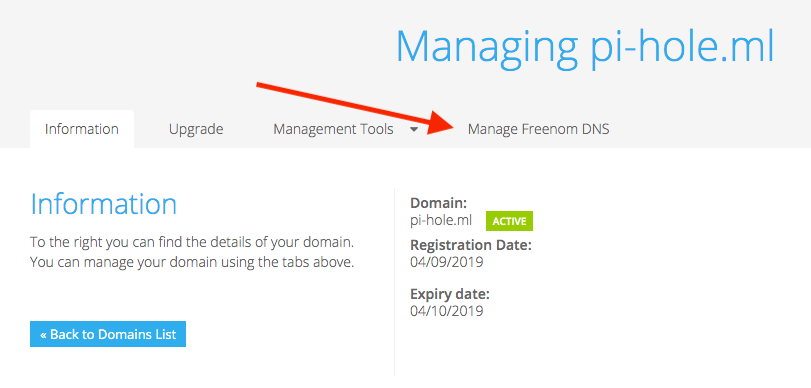
After you register your domain, go to your dashboard and click on the Manage Freedom DNS so we can enter the IP address of our VPS.
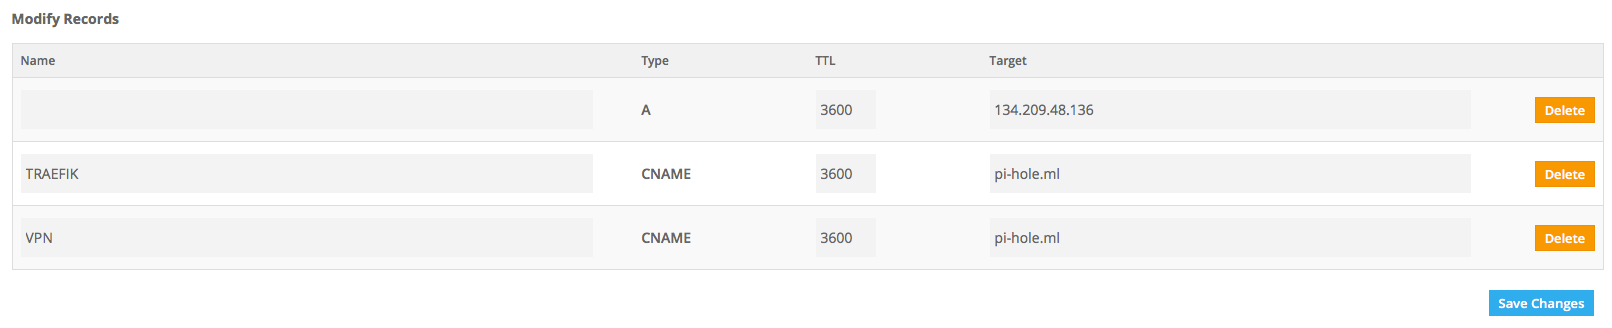
- A – Leave the Name blank and paste your VPS IP as the target, this will be our main URL for Pi-hole’s dashboard
- TRAEFIK CNAME – Subdomain for Traefik dashboard
- VPN CNAME – Required for OpenVPN config
Setting Up – OpenVPN
docker run --rm \
--log-driver=none \
-v ovpn-data-demyx:/etc/openvpn \
kylemanna/openvpn ovpn_genconfig -u udp://vpn.pi-hole.ml

docker run --rm -it \
--log-driver=none \
-v ovpn-data-demyx:/etc/openvpn \
kylemanna/openvpn ovpn_initpki
First command will generate the OpenVPN files in the named volume “ovpn-data-demyx” along with our subdomain URL for the UDP.
Second command will generate our keys. It will prompt you for a passphrase. You can enter your domain name as the Common Name in the second prompt.
docker run -it --rm \
-v ovpn-data-demyx:/etc/openvpn \
kylemanna/openvpn vi /etc/openvpn/openvpn.conf

# Config should look like this
push "block-outside-dns"
push "dhcp-option DNS 10.0.0.255"
push "comp-lzo no"
Execute the Docker command to edit openvpn.conf and point it to our Pi-hole’s IPv4 address: 10.0.0.255. Your config should look like the lines where it says “push.”
- Once the terminal editor is opened, press the letter i to edit the text
- Delete 1 of the DNS options and insert our custom address
- To save: press ESC key, shift + colon, type wq, then press Enter key
Setting Up – Authentications
If you want to generate a strong password and basic auth, feel free to use my image.
docker run -it --rm demyx/utilities pwgen -cns 50 1
docker run -it --rm demyx/utilities htpasswd -nb username password
First command generates a 50 character password and the second one generates your basic auth, used for Traefik and Pi-hole dashboard security logins. Modify the parameters to your needs.
The YAML
YAML (“YAML Ain’t Markup Language”) is a human-readable data-serialization language. It is commonly used for configuration files, but could be used in many applications where data is being stored (e.g. debugging output) or transmitted (e.g. document headers).
Wikipedia
version: "3.7"
services:
  traefik:
    image: traefik
    container_name: demyx_traefik
    restart: unless-stopped
    networks:
      - demyx
    ports:
      - 80:80
      - 443:443
    volumes:
      - /var/run/docker.sock:/var/run/docker.sock:ro
      - demyx_traefik:/demyx
    environment:
      - TRAEFIK_API=true
      - TRAEFIK_PROVIDERS_DOCKER=true
      - TRAEFIK_PROVIDERS_DOCKER_EXPOSEDBYDEFAULT=false
      - TRAEFIK_ENTRYPOINTS_HTTP_ADDRESS=:80
      - TRAEFIK_ENTRYPOINTS_HTTPS_ADDRESS=:443
      - TRAEFIK_CERTIFICATESRESOLVERS_DEMYX_ACME_HTTPCHALLENGE=true
      - TRAEFIK_CERTIFICATESRESOLVERS_DEMYX_ACME_HTTPCHALLENGE_ENTRYPOINT=http
      - [email protected]
      - TRAEFIK_CERTIFICATESRESOLVERS_DEMYX_ACME_STORAGE=/demyx/acme.json
      - TRAEFIK_LOG=true
      - TRAEFIK_LOG_LEVEL=INFO
      - TRAEFIK_LOG_FILEPATH=/demyx/error.log
      - TRAEFIK_ACCESSLOG=true
      - TRAEFIK_ACCESSLOG_FILEPATH=/demyx/access.log
      - TZ=America/Los_Angeles
    labels:
      - "traefik.enable=true"
      - "traefik.http.routers.traefik-http.rule=Host(`traefik.pi-hole.ml`)"
      - "traefik.http.routers.traefik-http.service=api@internal"
      - "traefik.http.routers.traefik-http.entrypoints=http"
      - "traefik.http.routers.traefik-http.middlewares=traefik-redirect"
      - "traefik.http.routers.traefik-https.rule=Host(`traefik.pi-hole.ml`)"
      - "traefik.http.routers.traefik-https.entrypoints=https"
      - "traefik.http.routers.traefik-https.service=api@internal"
      - "traefik.http.routers.traefik-https.tls.certresolver=demyx"
      - "traefik.http.routers.traefik-https.middlewares=traefik-auth"
      - "traefik.http.middlewares.traefik-auth.basicauth.users=demyx:$$apr1$$EqJj89Yw$$WLsBIjCILtBGjHppQ76YT1" # Basic auth password is demyx
      - "traefik.http.middlewares.traefik-redirect.redirectscheme.scheme=https"
  macbook:
    image: kylemanna/openvpn
    container_name: demyx_openvpn
    restart: unless-stopped
    volumes:
      - ovpn-data-demyx:/etc/openvpn
    cap_add:
      - NET_ADMIN
    ports:
      - 11941:1194/udp
    networks:
      - pihole
  iphone:
    image: kylemanna/openvpn
    container_name: demyx_openvpn_iphone
    restart: unless-stopped
    volumes:
      - ovpn-data-demyx:/etc/openvpn
    cap_add:
      - NET_ADMIN
    ports:
      - 11942:1194/udp
    networks:
      - pihole
  pihole:
    container_name: demyx_pihole
    image: pihole/pihole
    restart: unless-stopped
    volumes:
      - pihole:/etc/pihole
      - pihole-dnsmasq:/etc/dnsmasq.d
    environment:
      VIRTUAL_HOST: pi-hole.ml
      VIRTUAL_PORT: 80
      TZ: America/Los_Angeles # CHANGE THIS IF YOU WANT
      WEBPASSWORD: demyx # CHANGE THIS
      DNS1: "1.1.1.1"
      DNS2: "1.0.0.1"
    dns:
      - 127.0.0.1
      - 1.1.1.1
    labels:
      - "traefik.enable=true"
      - "traefik.http.routers.vpn-http.rule=Host(`pi-hole.ml`)"
      - "traefik.http.routers.vpn-http.entrypoints=http"
      - "traefik.http.routers.vpn-http.middlewares=vpn-redirect"
      - "traefik.http.routers.vpn-https.rule=Host(`pi-hole.ml`)"
      - "traefik.http.routers.vpn-https.entrypoints=https"
      - "traefik.http.routers.vpn-https.tls.certresolver=demyx"
      - "traefik.http.middlewares.vpn-redirect.redirectscheme.scheme=https"
      - "traefik.http.routers.vpn-https.service=vpn"
      - "traefik.http.services.vpn.loadbalancer.server.port=80"
      - "traefik.http.routers.vpn-https.middlewares=vpn-auth"
      - "traefik.http.middlewares.vpn-auth.basicauth.users=demyx:$$apr1$$EqJj89Yw$$WLsBIjCILtBGjHppQ76YT1" # Basic auth password is demyx
    networks:
      demyx:
      pihole:
        ipv4_address: 10.0.0.255
volumes:
  ovpn-data-demyx:
    name: ovpn-data-demyx
  pihole:
    name: pihole
  pihole-dnsmasq:
    name: pihole-dnsmasq
  traefik:
    name: traefik
networks:
  demyx:
    name: demyx
  pihole:
    name: pihole
    ipam:
      driver: default
      config:
        - subnet: 10.0.0.0/16
Modify the necessary info first (email/domain/passwords), copy all of this, save it as docker-compose.yml, and then run:
docker-compose up -d
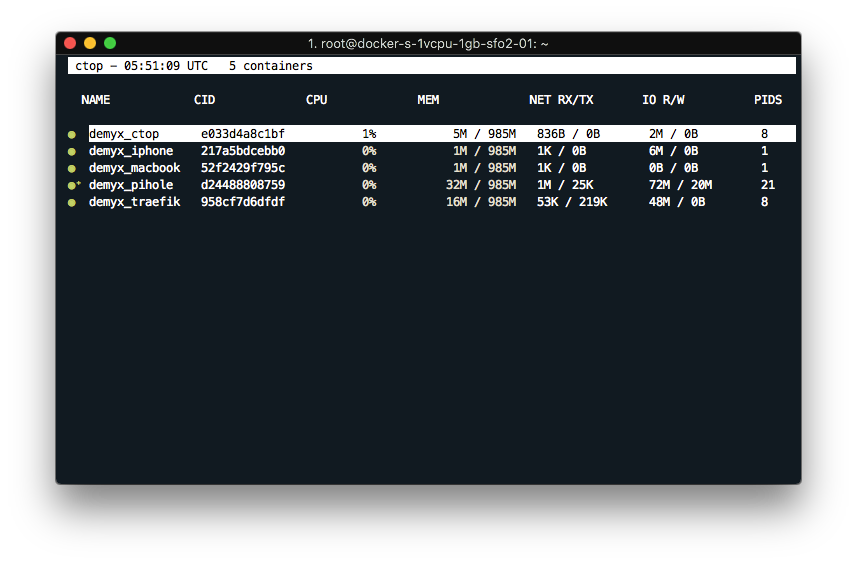
docker run -it --rm \
--name demyx_ctop \
-v /var/run/docker.sock:/var/run/docker.sock:ro \
quay.io/vektorlab/ctop
If everything went well, you should see all of the containers are up and running by executing the command above. You should also check if both of the dashboards are up. Both are protected by basic auth credentials:
- Basic Auth Username: demyx
- Basic Auth Password: demyx
- Pi-hole Default Password: demyx
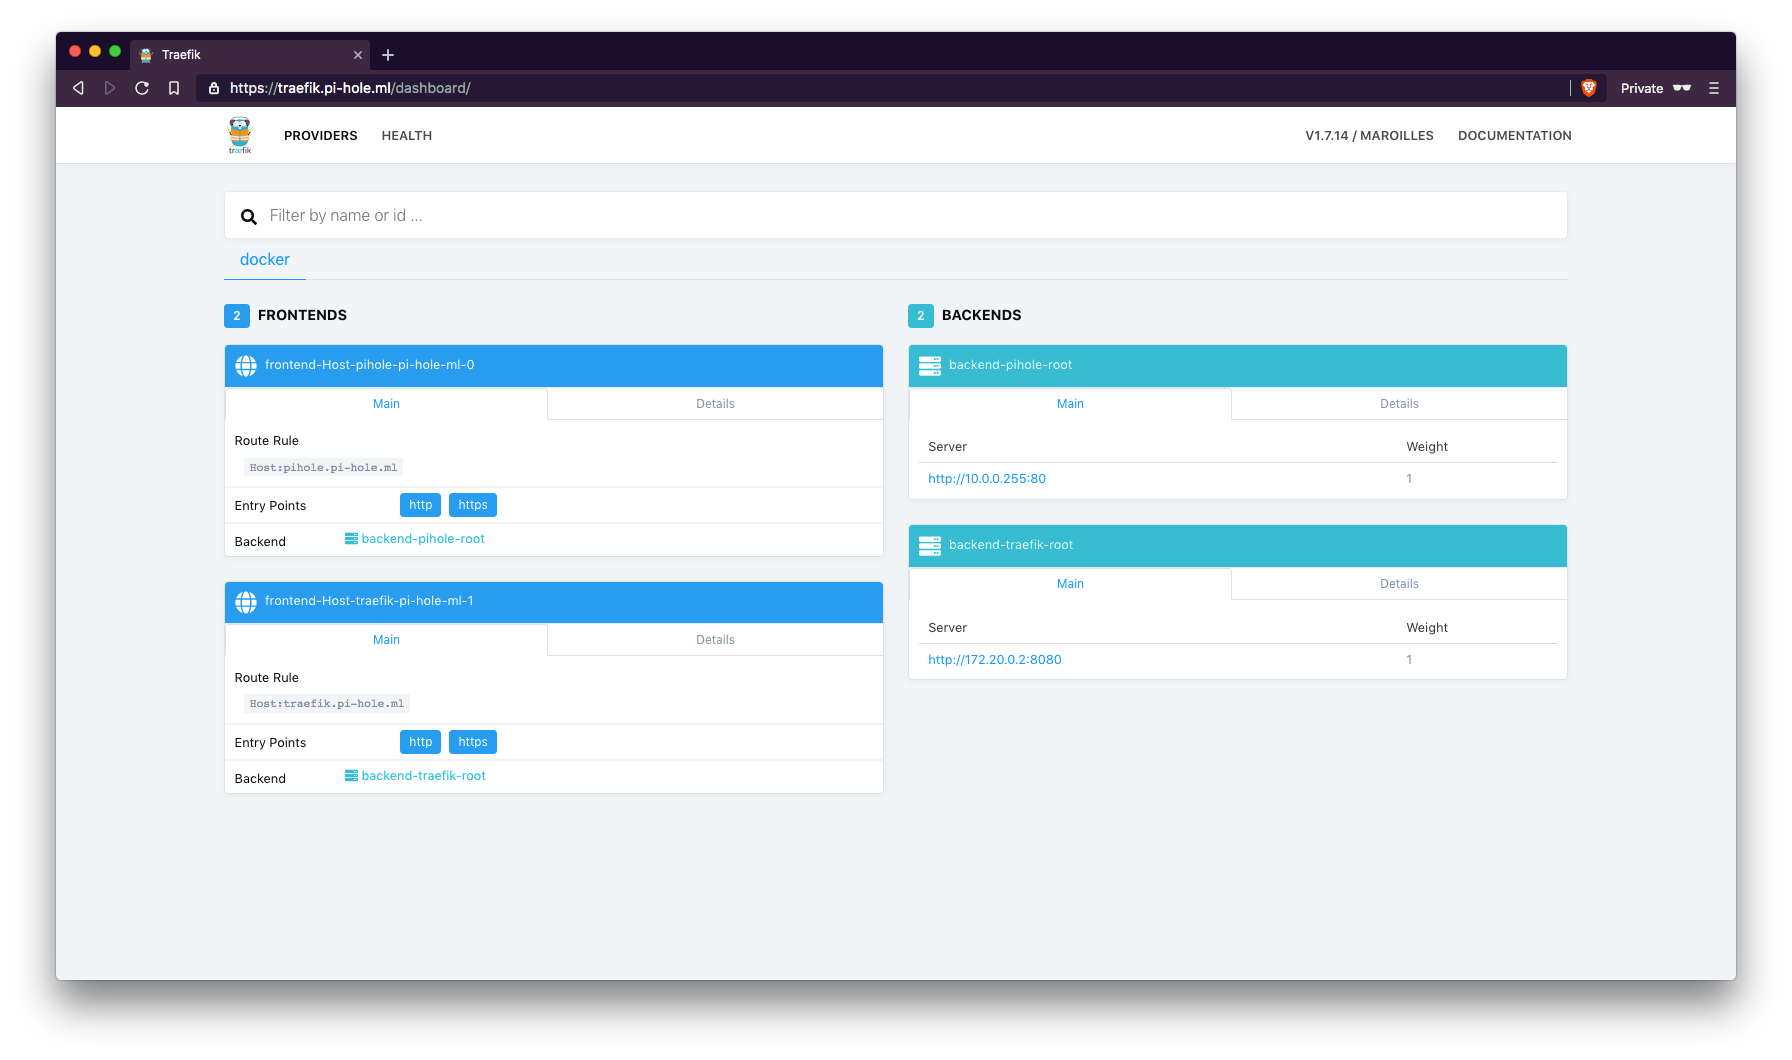
traefik.pi-hole.ml
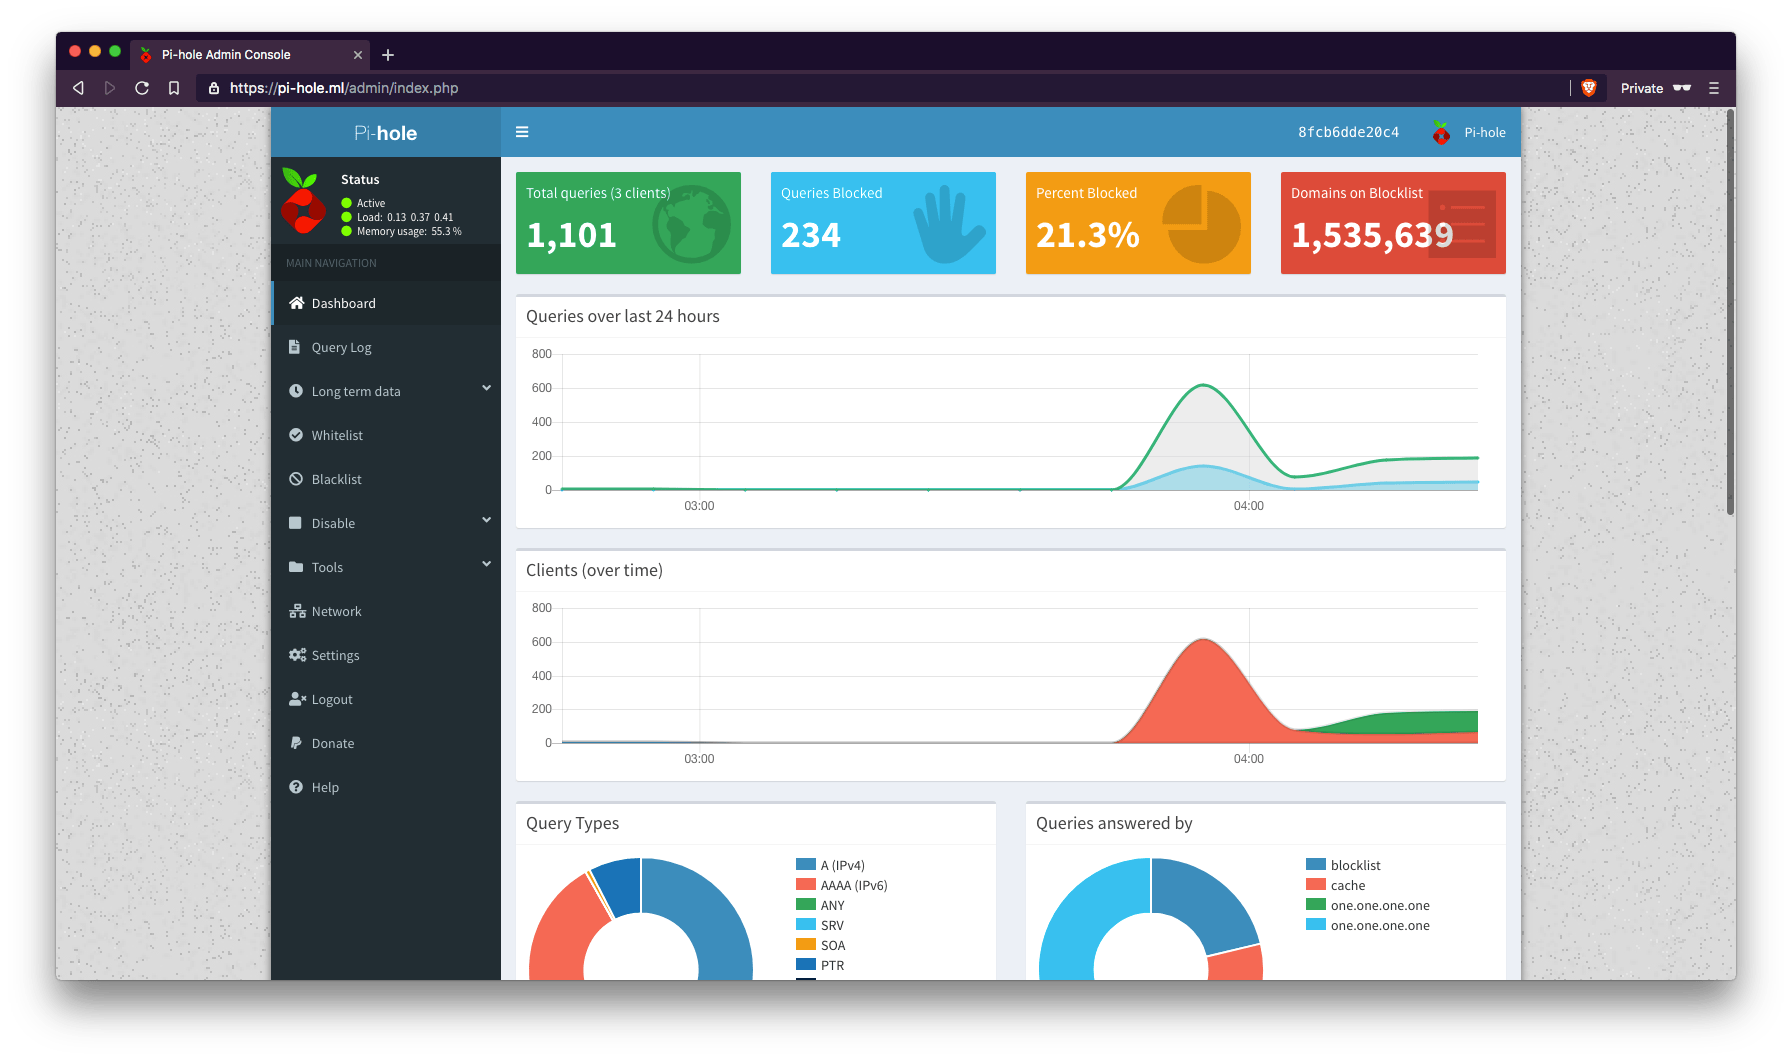
Once you confirmed the services and URLs are up and running, we can now configure Pi-hole.
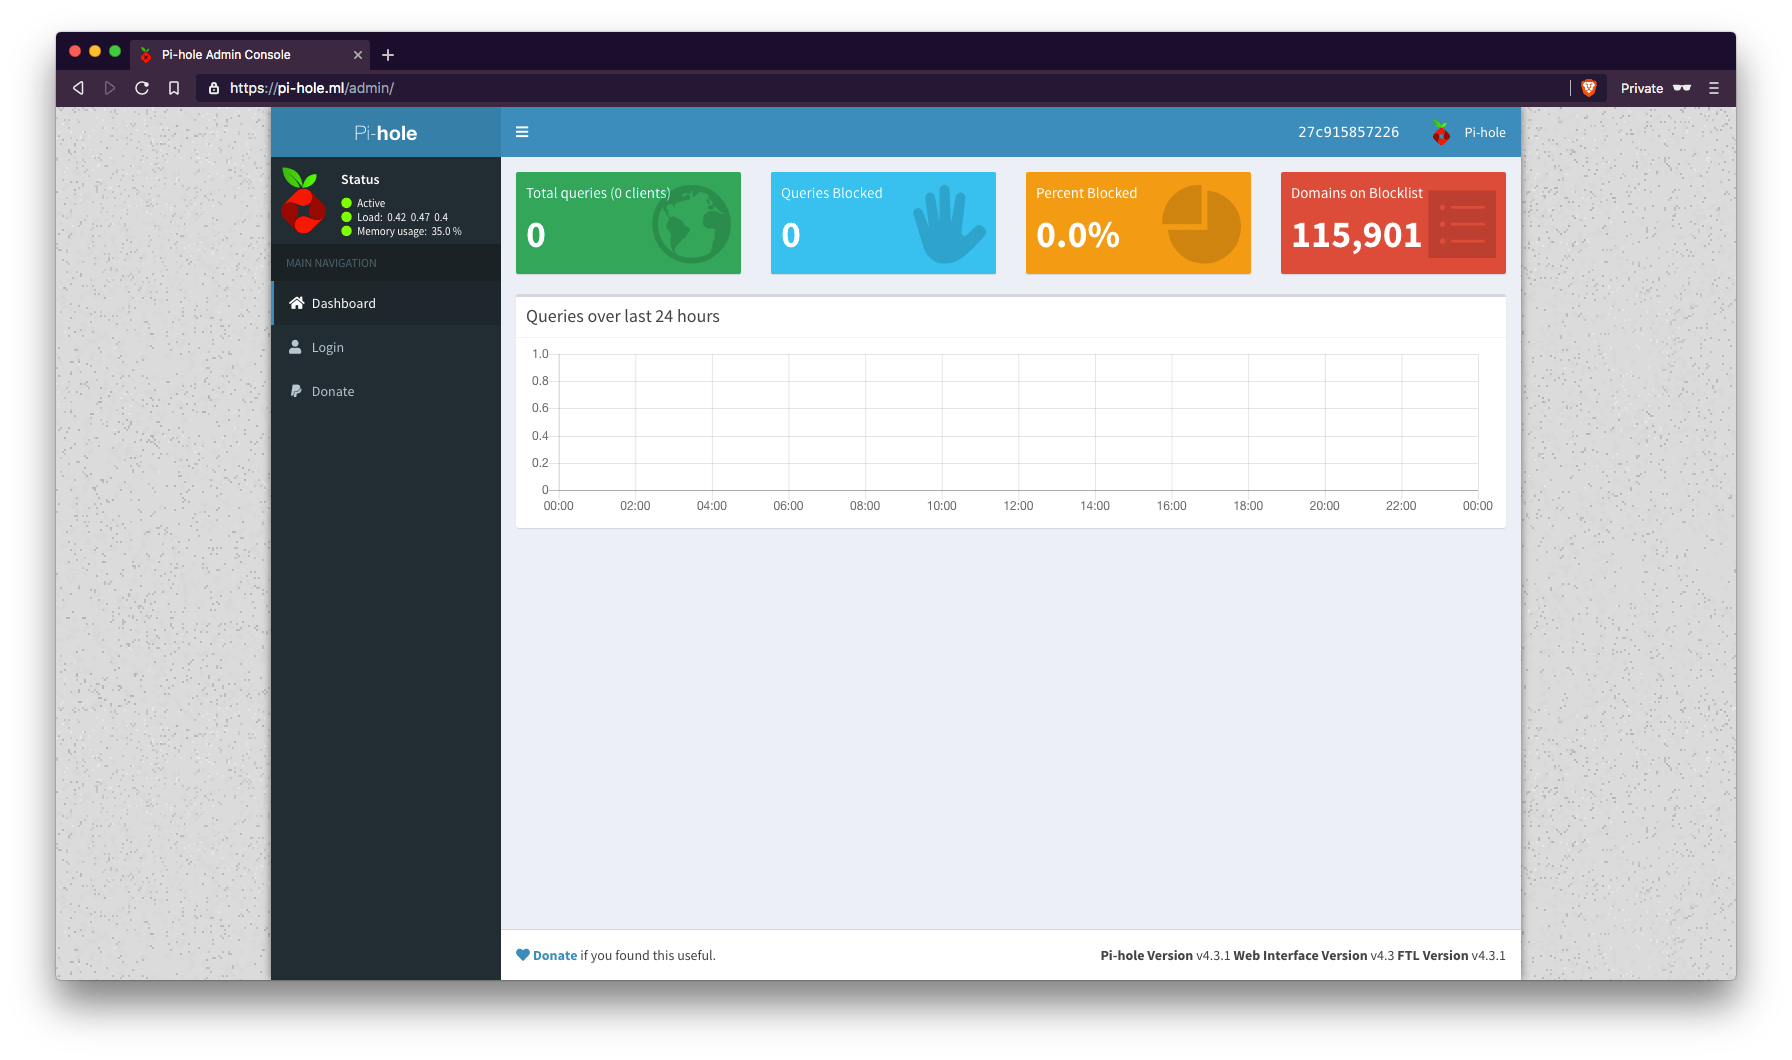
Pi-hole
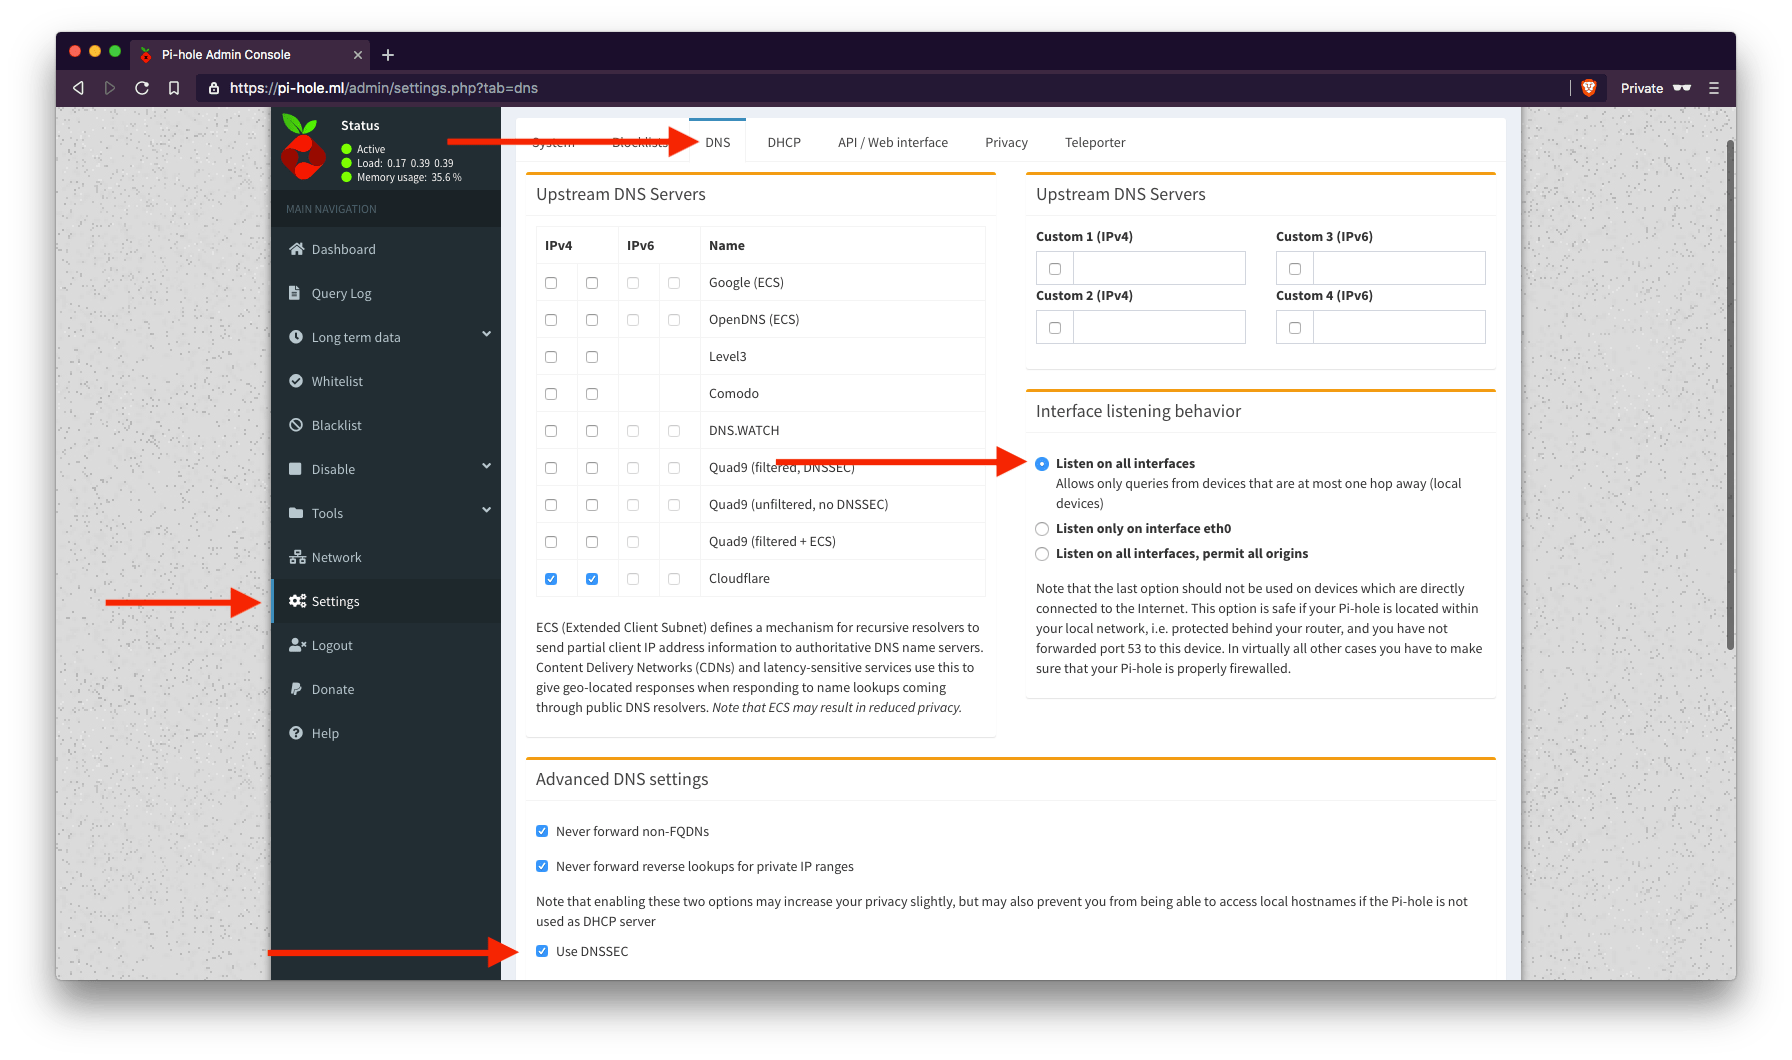
Log-in using the password you put in WEBPASSWORD in the YAML, then go to the DNS tab in the Settings page. Be sure to hit Save at the bottom right of the page.
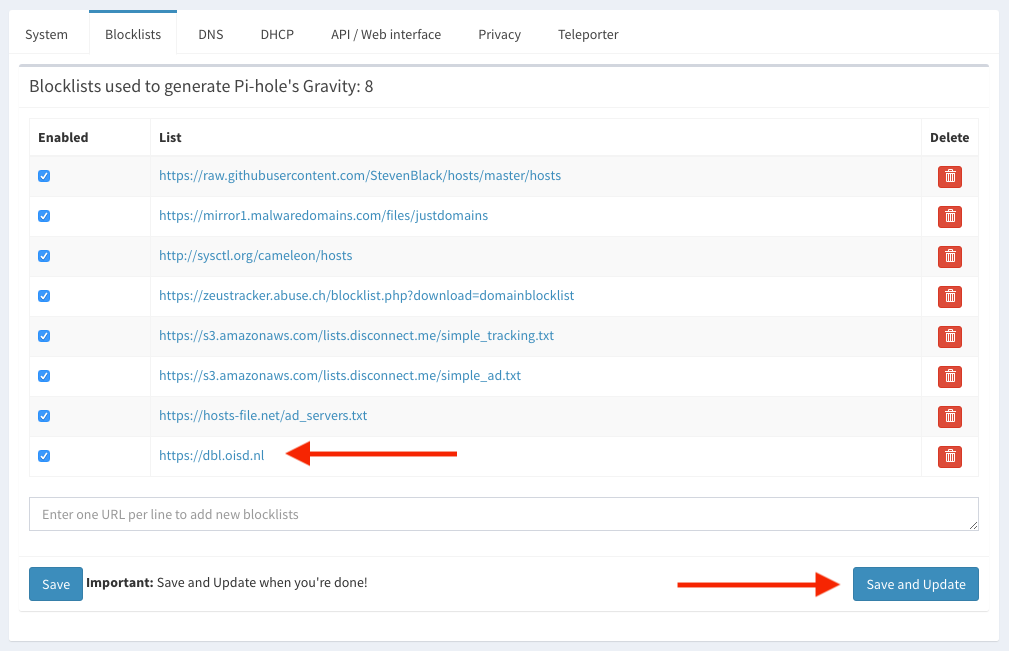
On the same page, click the Blocklists tab, add this url dbl.oisd.nl then click Save and Update.
  [i] Pi-hole blocking is enabled
  [i] Neutrino emissions detected...
  [✓] Pulling blocklist source list into range

  [i] Target: raw.githubusercontent.com (hosts)
  [✓] Status: Retrieval successful

  [i] Target: mirror1.malwaredomains.com (justdomains)
  [✓] Status: No changes detected

  [i] Target: sysctl.org (hosts)
  [✓] Status: No changes detected

  [i] Target: zeustracker.abuse.ch (blocklist.php?download=domainblocklist)
  [✓] Status: Retrieval successful

  [i] Target: s3.amazonaws.com (simple_tracking.txt)
  [✓] Status: No changes detected

  [i] Target: s3.amazonaws.com (simple_ad.txt)
  [✓] Status: No changes detected

  [i] Target: hosts-file.net (ad_servers.txt)
  [✓] Status: No changes detected

  [i] Target: dbl.oisd.nl (dbl.oisd.nl)
  [✓] Status: Retrieval successful

  [✓] Consolidating blocklists
  [✓] Extracting domains from blocklists
  [i] Number of domains being pulled in by gravity: 1641132
  [✓] Removing duplicate domains
  [i] Number of unique domains trapped in the Event Horizon: 1535639
  [i] Nothing to whitelist!
  [i] Number of regex filters: 0
  [✓] Parsing domains into hosts format
  [✓] Cleaning up stray matter

  [✓] DNS service is running
  [✓] Pi-hole blocking is Enabled
Notice from the output: Number of unique domains trapped in the Event Horizon: 1535639.
1.5+ MILLION!
Now go back to your dashboard and check the box on the far right.
One last thing is to add a cron job to auto update the block lists. I’m not sure Pi-hole container already does this but add it anyways:
docker exec demyx_pihole pihole updateGravity
OpenVPN
Notice in my YAML that I have 2 services of OpenVPN. This is to show per device queries used for Pi-hole dashboard logs. Also notice that each of the services are using different ports.
OpenVPN defaults to port 1194 but you can only use a port once on the host OS. What I’ve done is add an extra number at the end and increment it. You have to do this per device if you’re planning to add more and you will see why.
# Creating OpenVPN profiles

docker run --rm -it \
-v ovpn-data-demyx:/etc/openvpn \
--log-driver=none \
kylemanna/openvpn easyrsa build-client-full macbook nopass

docker run --rm -it \
-v ovpn-data-demyx:/etc/openvpn \
--log-driver=none \
kylemanna/openvpn easyrsa build-client-full iphone nopass
We’re gonna create our OpenVPN profiles per devices. As you can see, the commands are executed separately for each devices.
# Exporting OpenVPN profiles

docker run --rm \
-v ovpn-data-demyx:/etc/openvpn \
--log-driver=none \
kylemanna/openvpn ovpn_getclient macbook > macbook.ovpn

docker run --rm \
-v ovpn-data-demyx:/etc/openvpn \
--log-driver=none \
kylemanna/openvpn ovpn_getclient iphone > iphone.ovpn

Our profiles are exported but we’re not done yet. We need to change the default port (1194) that’s in the profiles by executing the commands below:
# Search and replace

sed -i 's/1194/11941/g' macbook.ovpn
sed -i 's/1194/11942/g' iphone.ovpn
Now you can export these profiles to your devices.
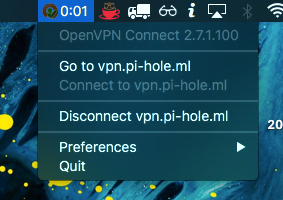
Connecting – Computer
OpenVPN has clients for all major operating systems but for some reason, the MacOS client is hidden deep in their website, link here. Linux does not need the client because all the major Desktop Environments (DE) have it built-in.
# Print out the macbook.ovpn profile

cat macbook.ovpn

Copy the output, create a file named macbook.ovpn, and save it. After you install the macOS OpenVPN client, import it.

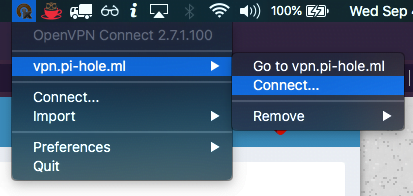

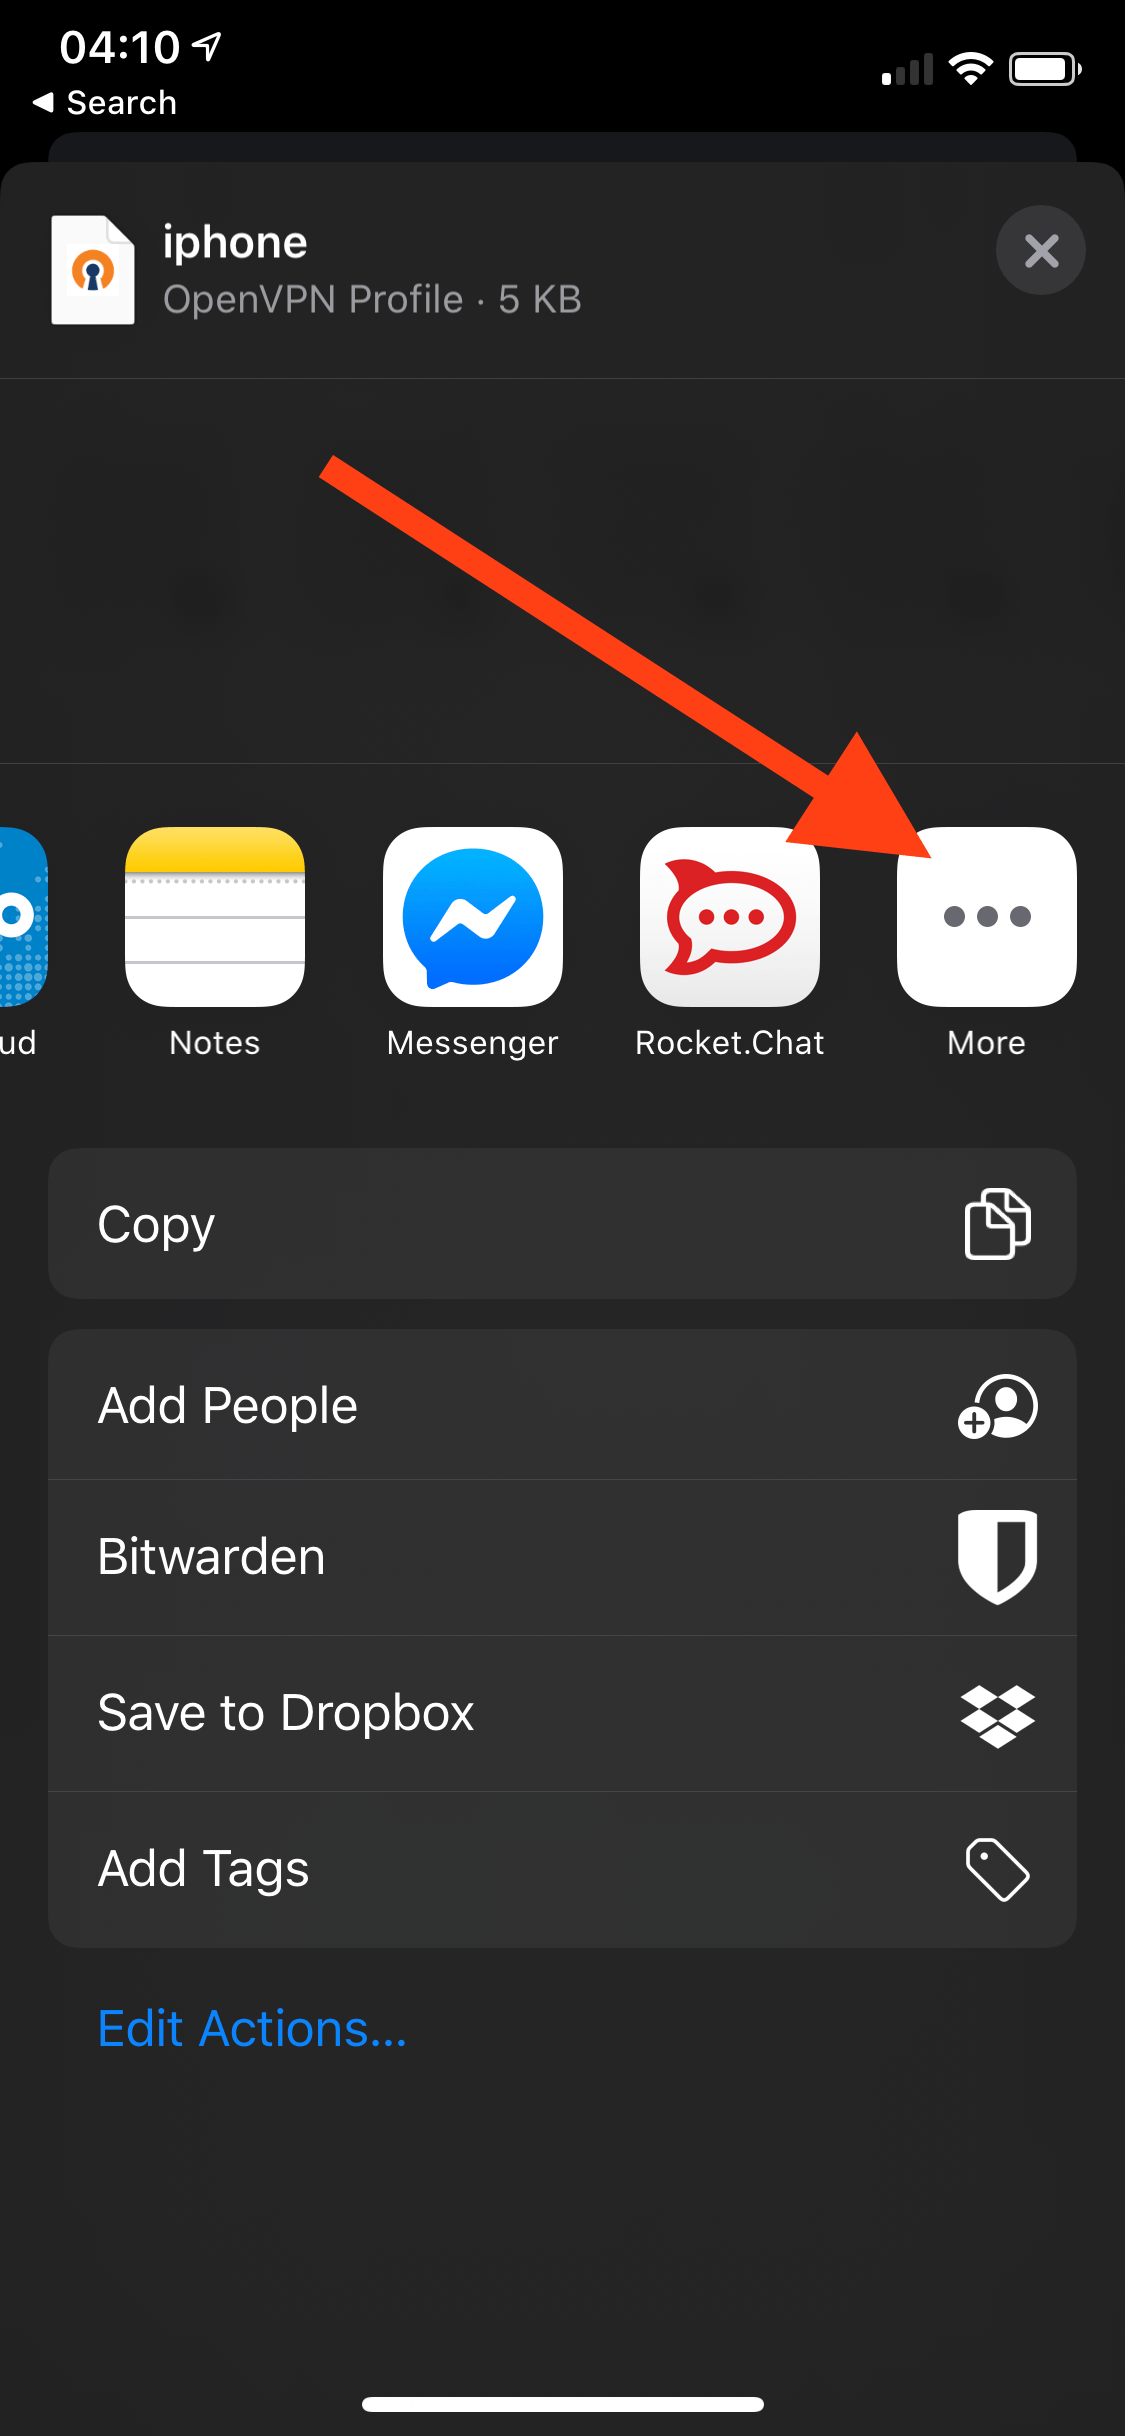
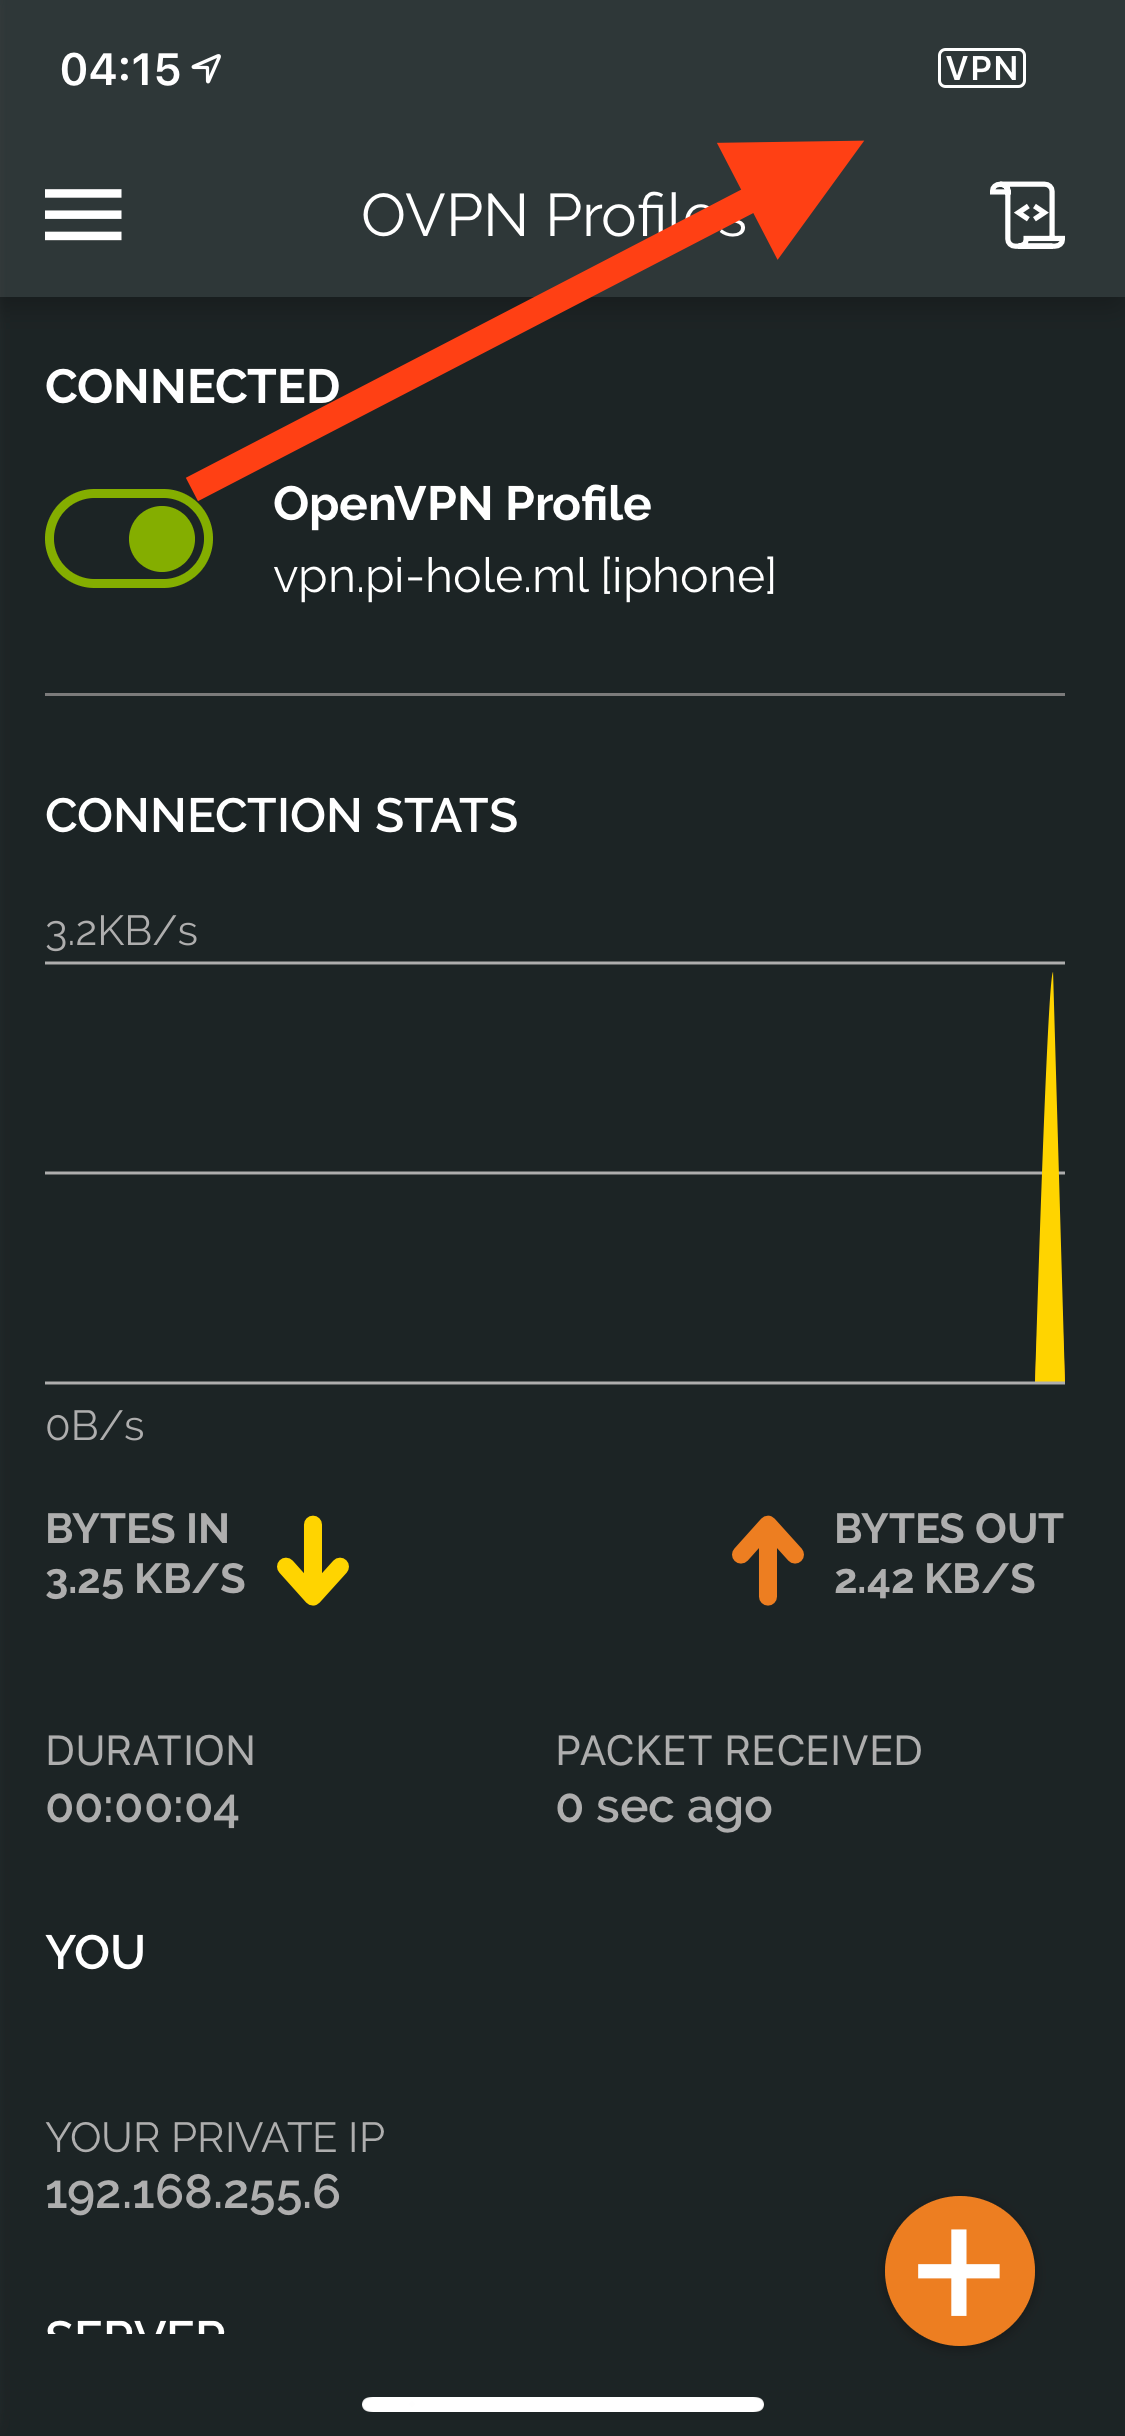
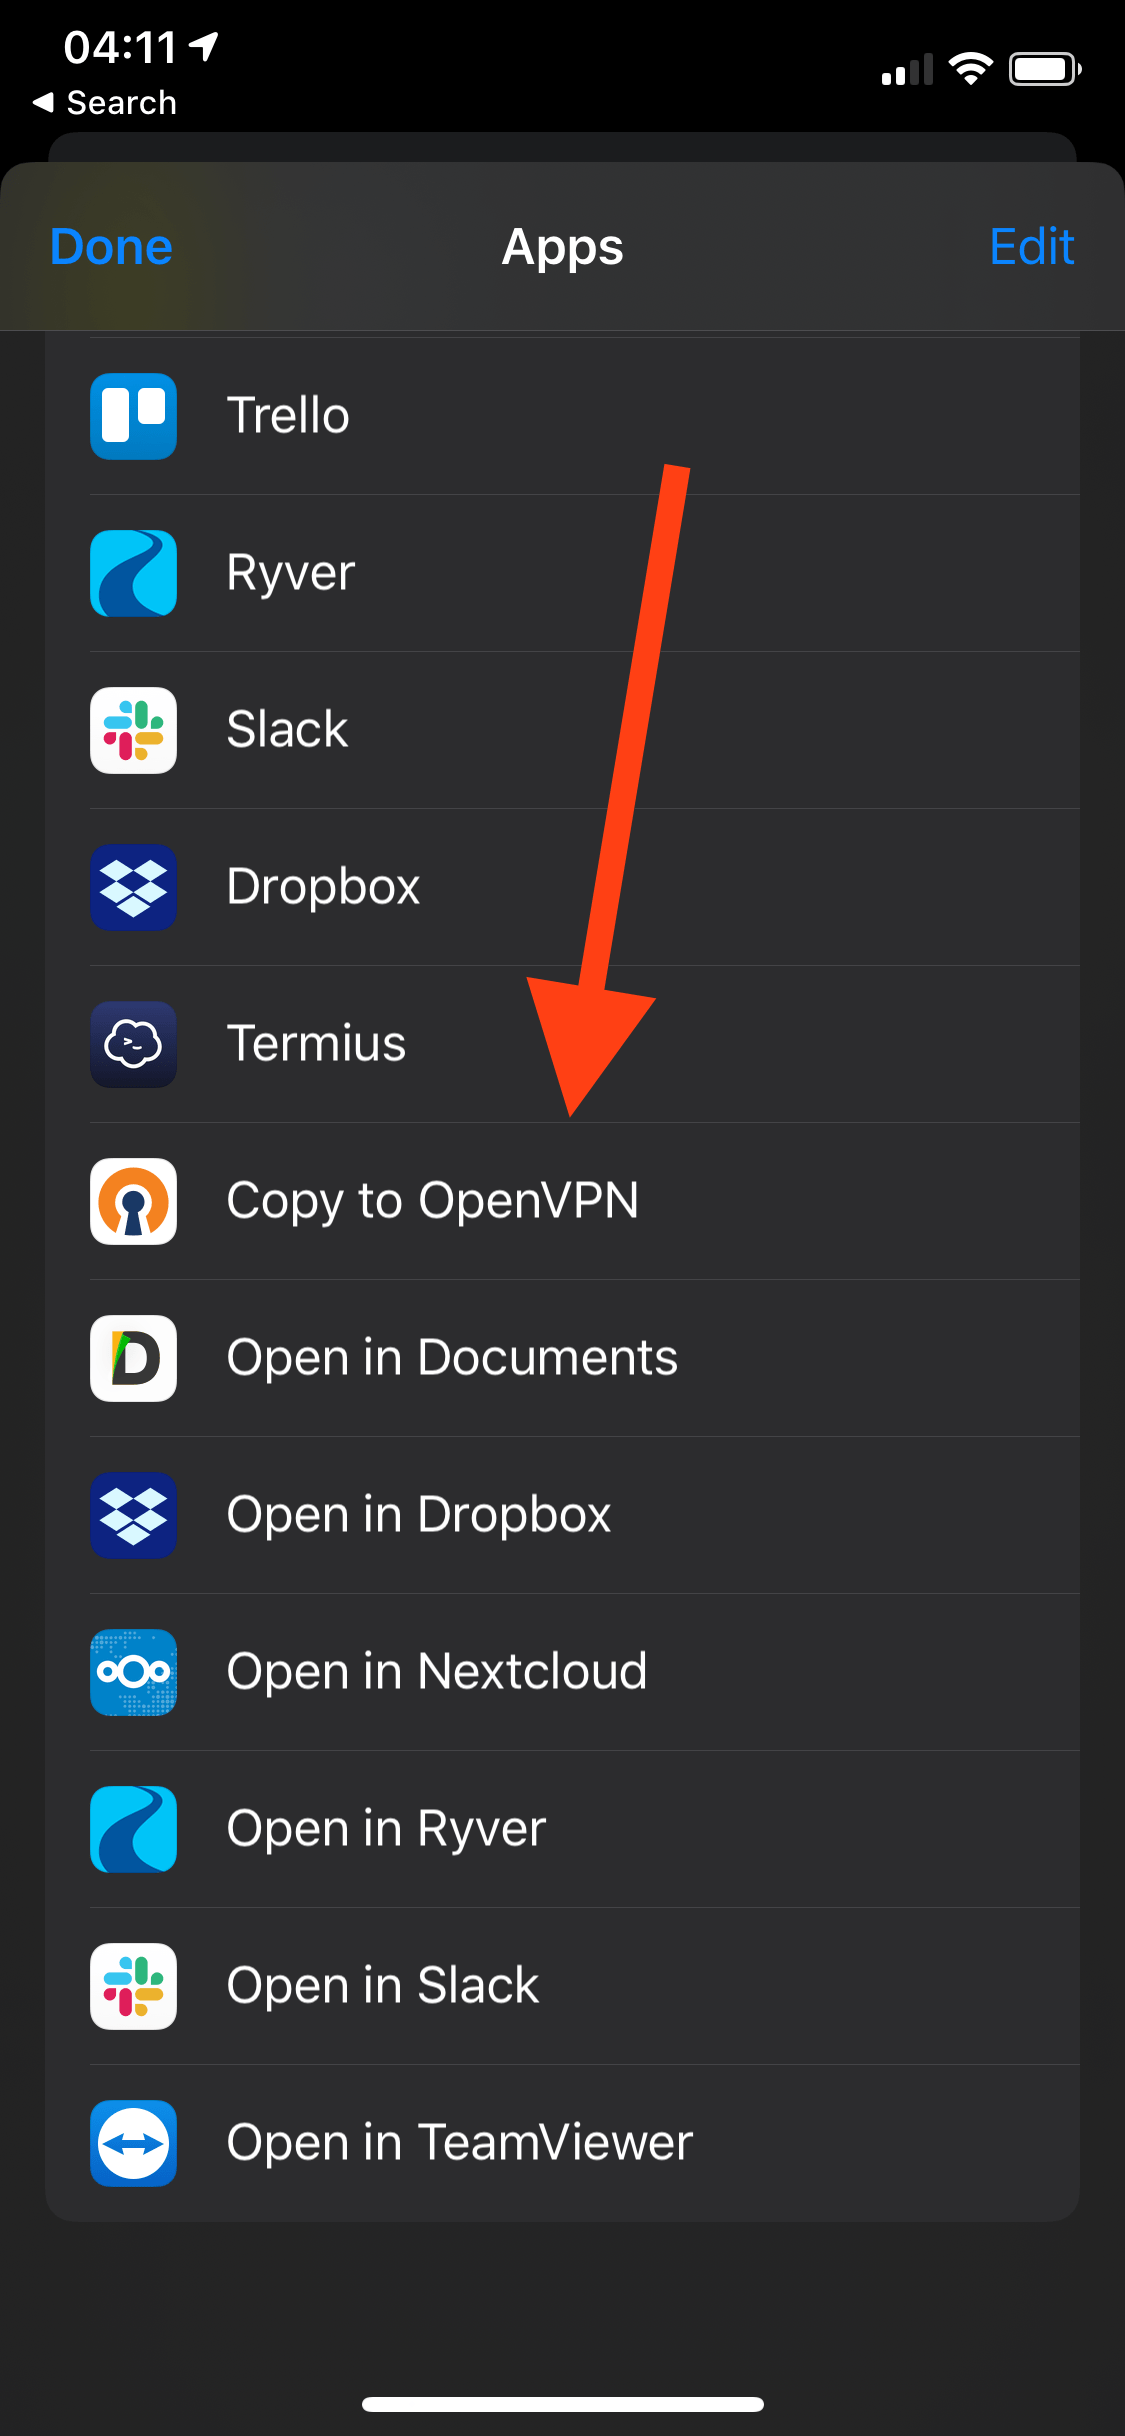
Connecting – Phone
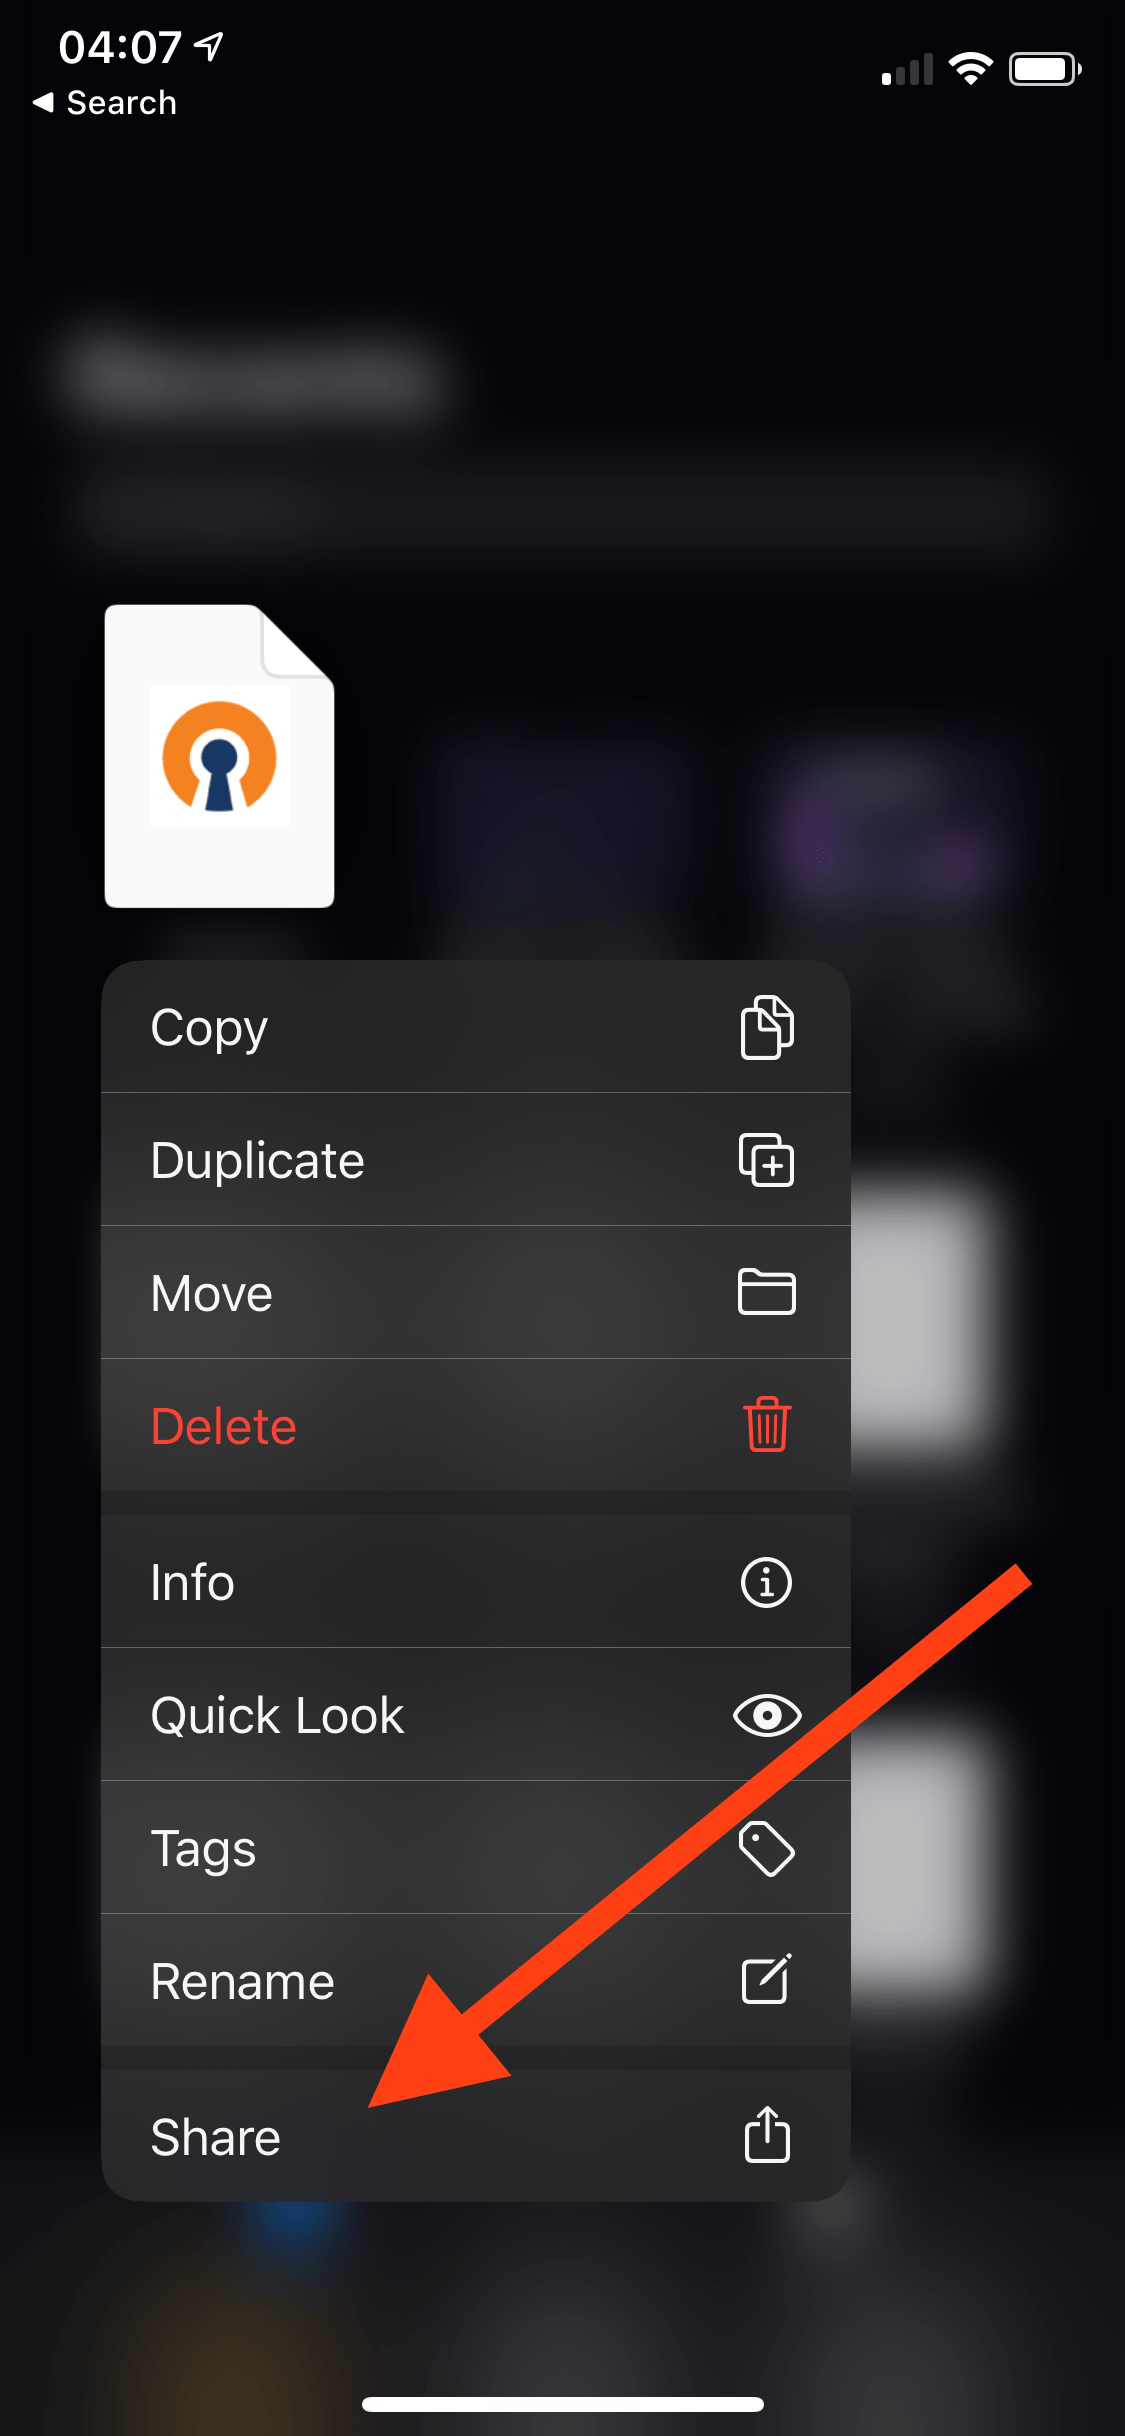
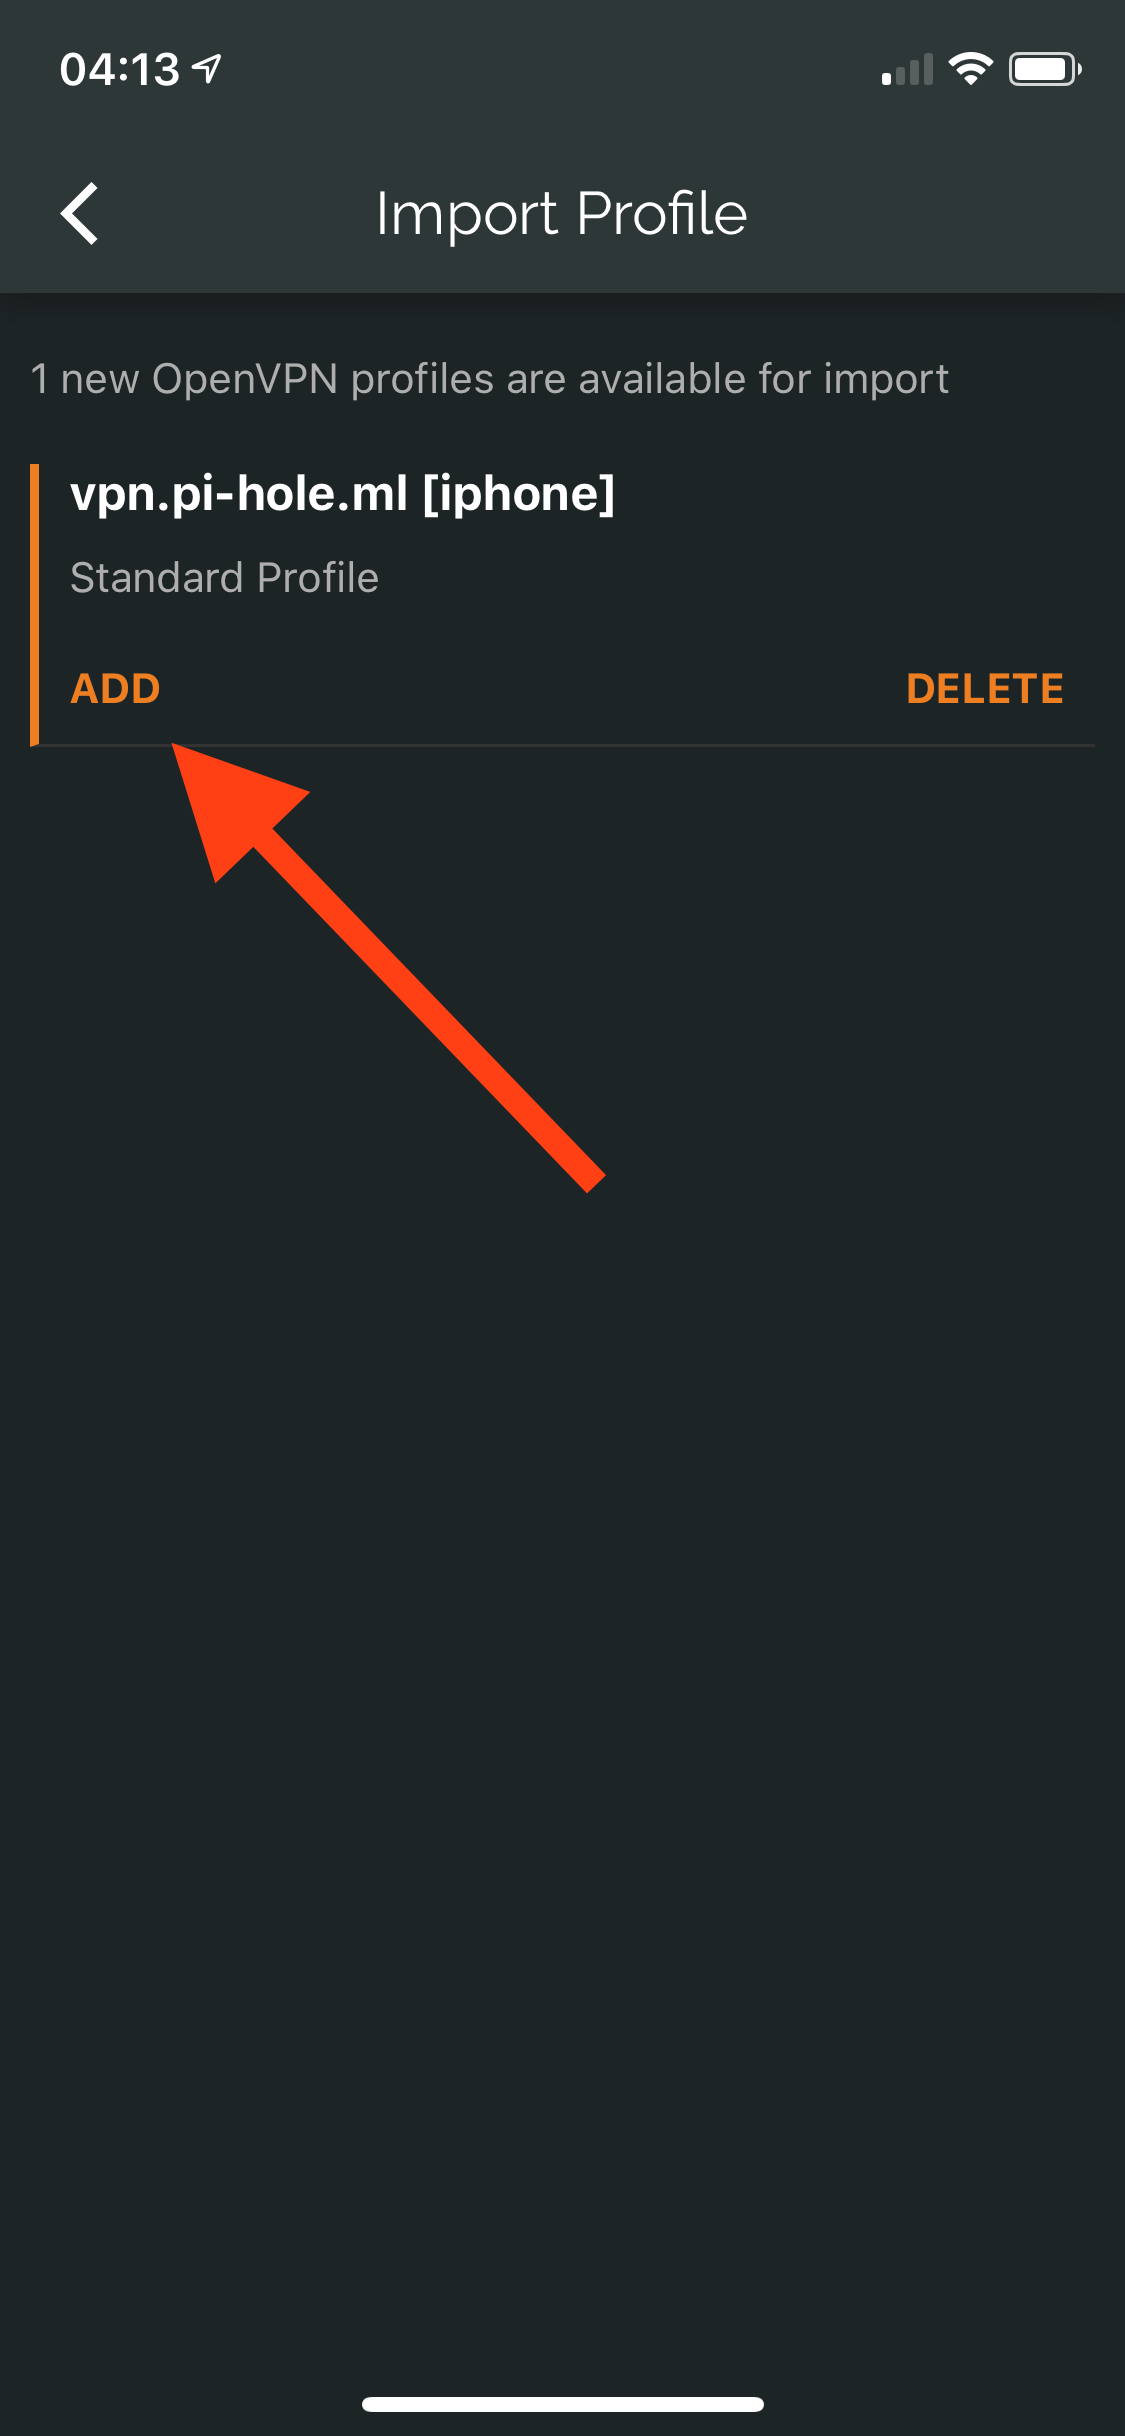
Repeat the steps from the macOS profile and either save it to your iCloud Drive, iMessage, or email it to yourself. I chose iCloud Drive. You will need to download the OpenVPN app from the App Store.

Connecting – Linux
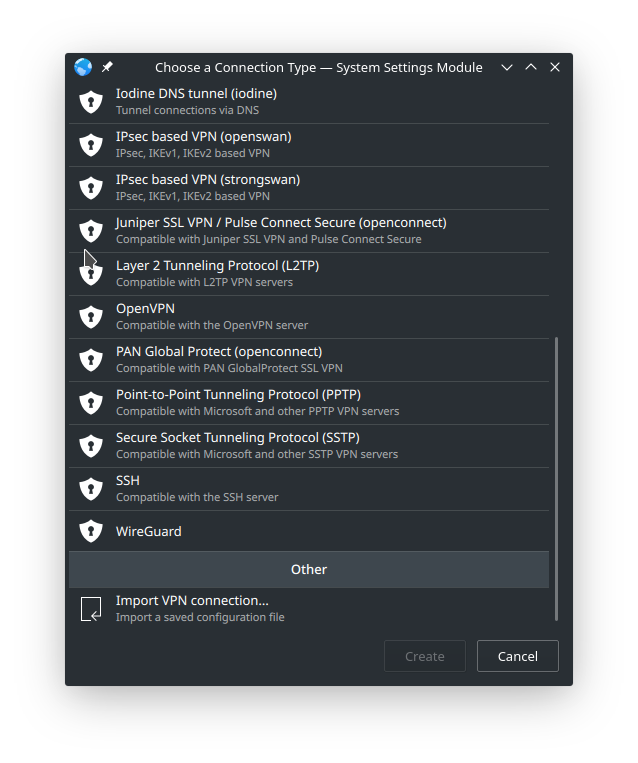
I’m running Manjaro KDE so your settings will probably be different. Open your network manager and find a VPN panel.
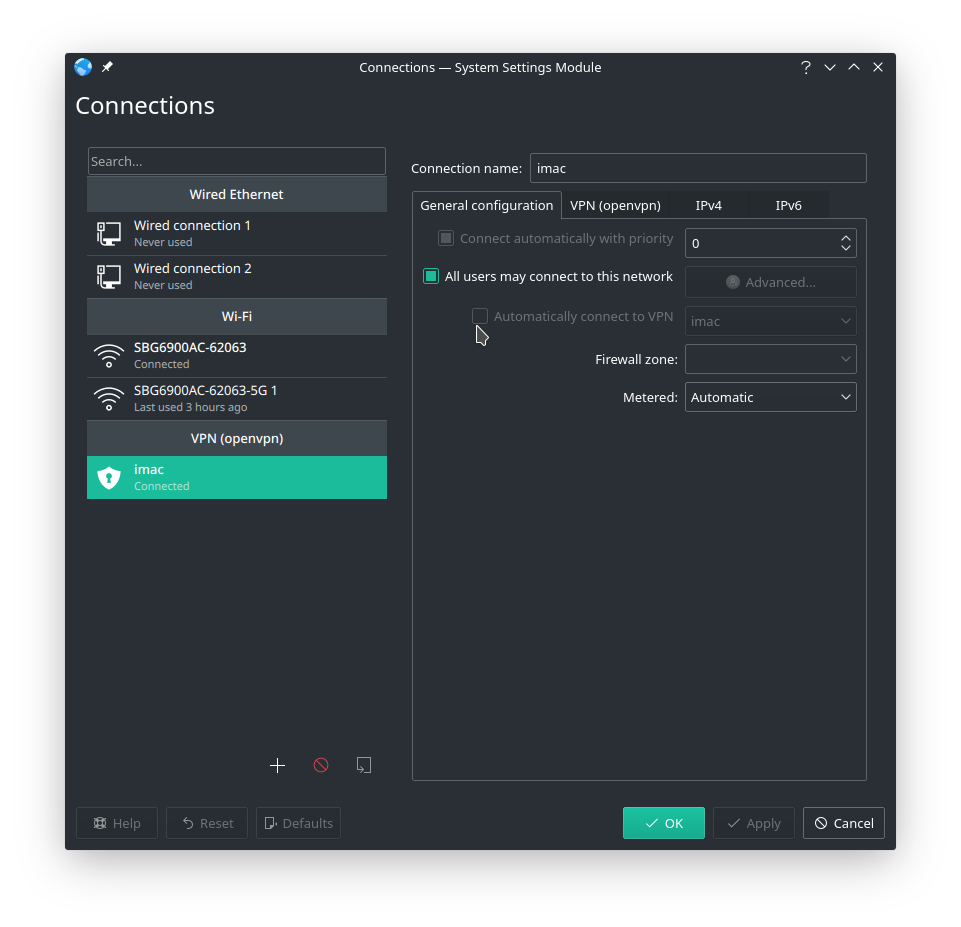
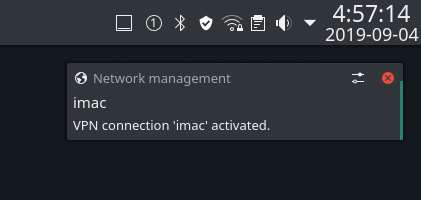

Yes. You guessed correctly. I am running linux on an iMac.
Conclusion
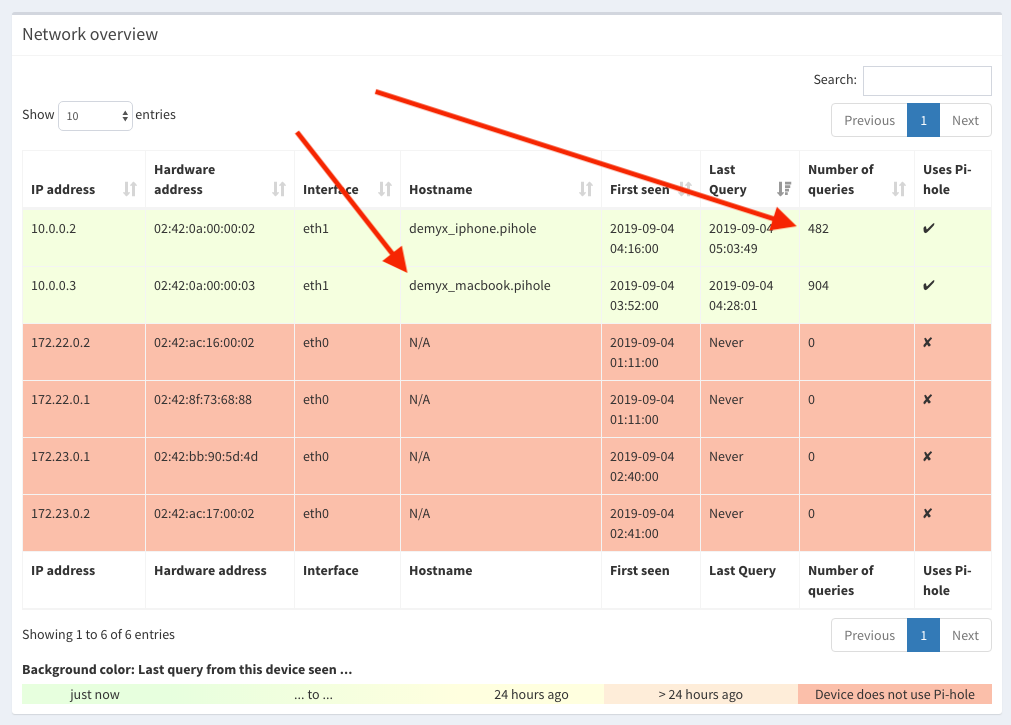
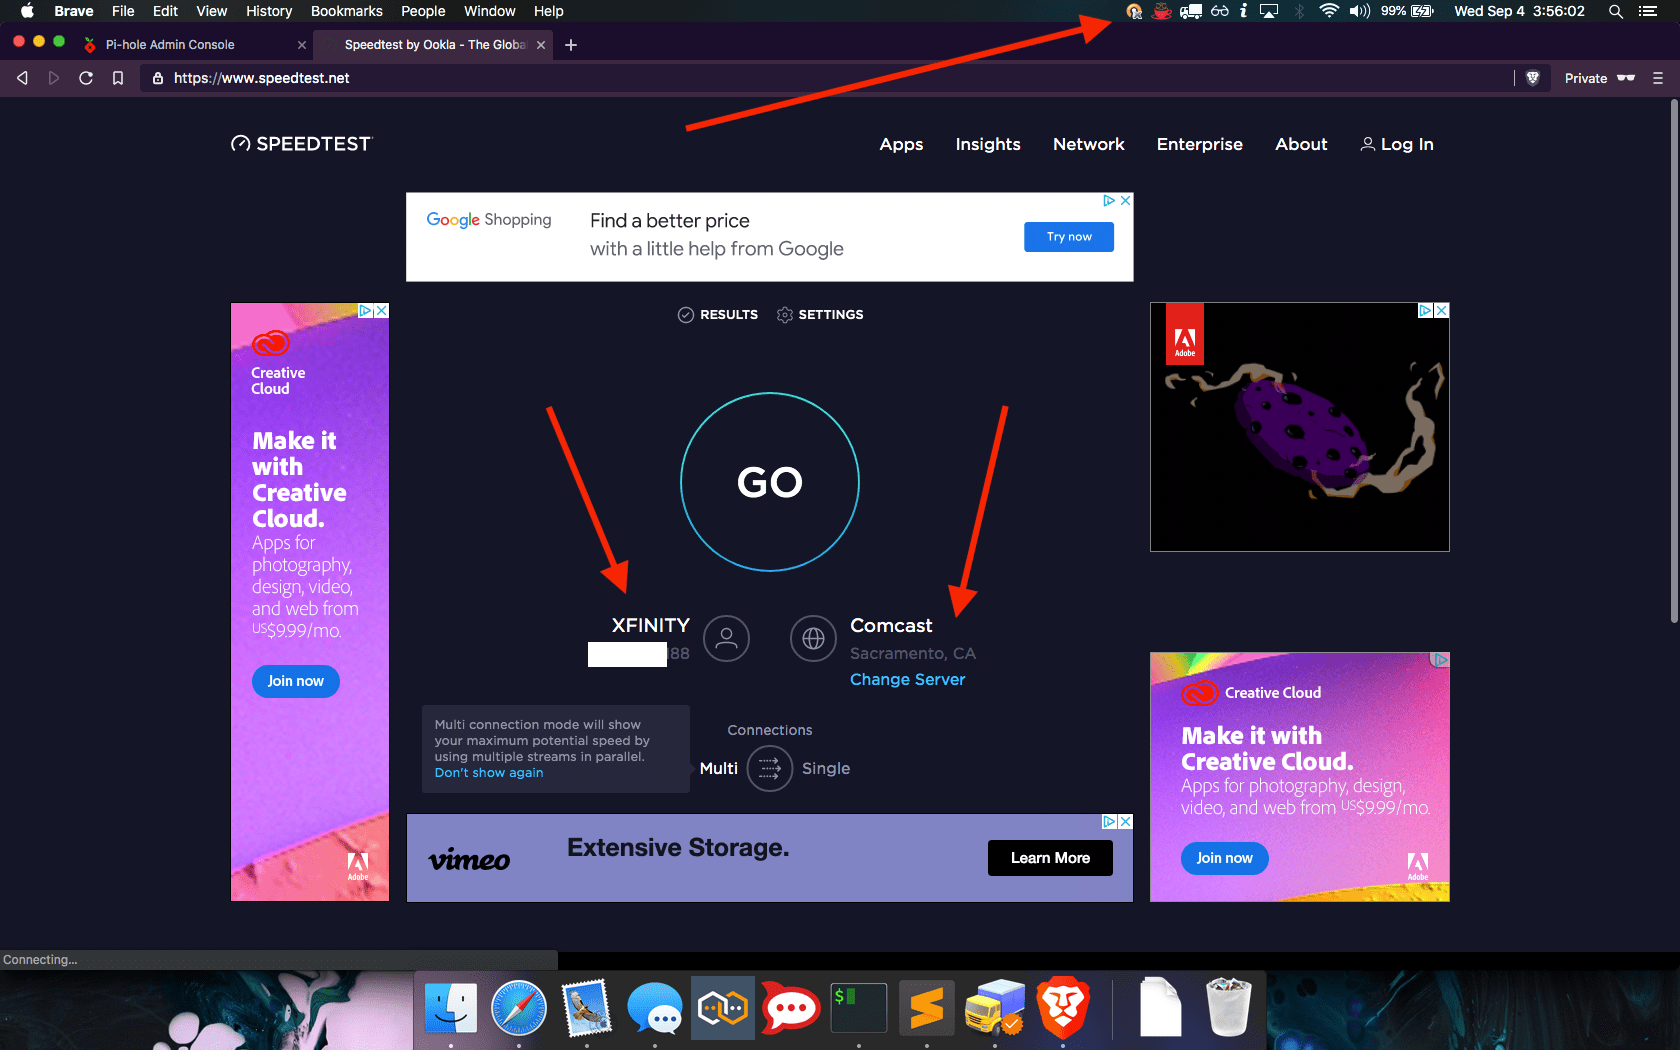
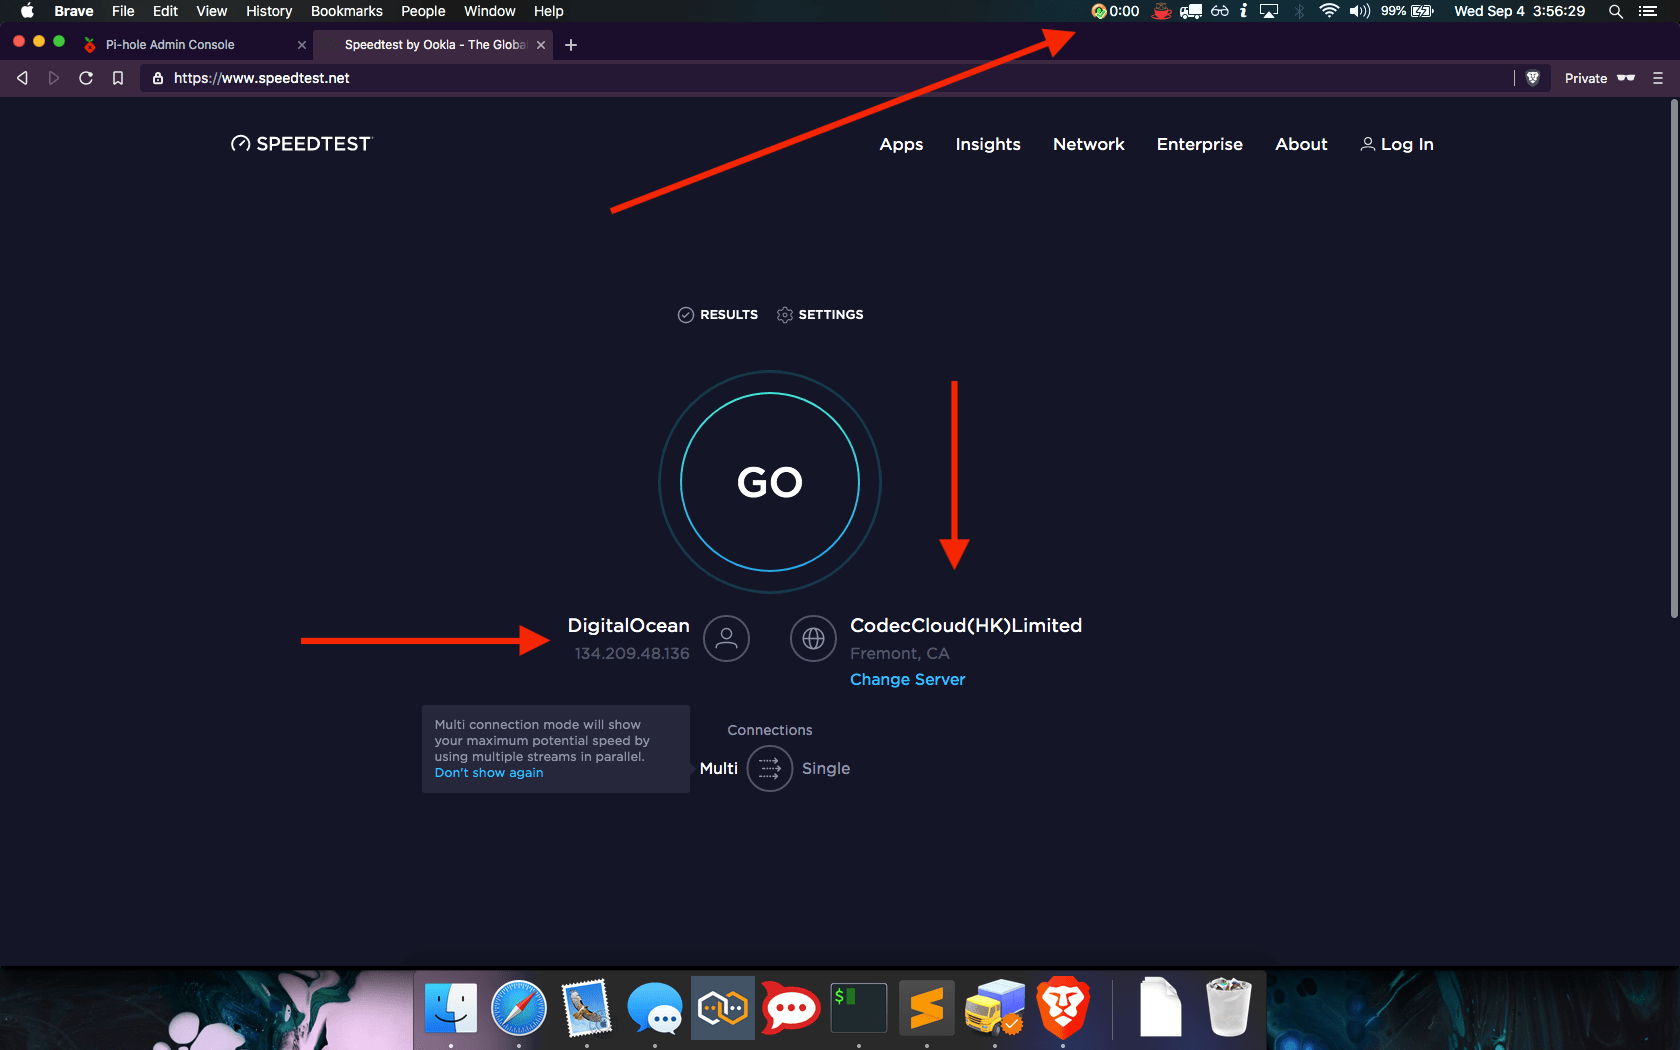
As you can see, our devices are connected in the Network page. If you find any errors or want to improve upon this, then please leave a comment below. If you find this article useful then please share it!
Hey thanks for the very detailed write-up. I’ve been trying to get an OpenVPN server running on docker for awhile now and have had no luck. Quick question – in your YAML, it looks like you’re using Traefik v2 but the screenshot is obviously 1.7.14. Was this working correctly with v1 or did you need to use v2 in the end? Thanks again
I’ve updated the YAML for Traefik v2 but the 1.x did work before updating it. I should update the screenshots but that’s software for ya, always updating/evolving.
Great, thanks for the reply!
Hola, me ayudarias a montar un servidor en l2tp con pihole?
Lo siento, no uso l2tp.
Thanks for the detailled tutorial, getting an error while setting auth tho:
debian@vps-149e0e63:~$ docker run -it –rm demyx/utilities “pwgen -cns 50 1”
docker: Error response from daemon: OCI runtime create failed: container_linux.go:370: starting container process caused: exec: “pwgen -cns 50 1”: executable file not found in $PATH: unknown.
ERRO[0001] error waiting for container: context canceled
debian@vps-149e0e63:~$ sudo docker run -it –rm demyx/utilities “pwgen -cns 50 1”
docker: Error response from daemon: OCI runtime create failed: container_linux.go:370: starting container process caused: exec: “pwgen -cns 50 1”: executable file not found in $PATH: unknown.
ERRO[0002] error waiting for container: context canceled
debian@vps-149e0e63:~$ sudo su
root@vps-149e0e63:/home/debian# docker run -it –rm demyx/utilities “pwgen -cns 50 1”
docker: Error response from daemon: OCI runtime create failed: container_linux.go:370: starting container process caused: exec: “pwgen -cns 50 1”: executable file not found in $PATH: unknown.
root@vps-149e0e63:/home/debian# docker run -it –rm demyx/utilities “htpasswd -nb leophir totobaba”
docker: Error response from daemon: OCI runtime create failed: container_linux.go:370: starting container process caused: exec: “htpasswd -nb login pass”: executable file not found in $PATH: unknown.
ERRO[0001] error waiting for container: context canceled
root@vps-149e0e63:/home/debian#
Hi Leophir,
Sorry for the delay, I forgot to update the commands but you’ll need to run those commands without the quotes.
Example: docker run -it –rm demyx/utilities htpasswd -nb username password