
How to easily manage multiple WordPress sites in Docker using Demyx

Updated 2022-04-21 – Demyx 1.4.0
First of all, what the heck is Demyx?
Demyx is a Docker image that automates and manages WordPress installations. Traefik for reverse proxy with Lets Encrypt SSL/TLS. WordPress sites are powered by NGINX, PHP, and MariaDB.
https://demyx.sh
Step 1. DigitalOcean
Now that’s out of the way, this article will show you a step-by-step guide on how to use Demyx. I’ve tested this briefly on Debian, Ubuntu, and CentOS; all works fine but CentOS needs some minor tweaks. I have Alpine Linux on all my servers so of course it 100% works. I’ll be using DigitalOcean for this guide, using their pre-made Docker droplet in the marketplace running Ubuntu 18.04 x64.

digitalocean.com
Step 2. Install
Run this command to run the install script. It will download all the necessary Docker images that Demyx uses. After it downloads the images, please fill out the prompts. After you install, you will see my own MOTD (Message of the Day).
Notice on the screenshot below that I’ve enabled Traefik dashboard and code-server. You can see/edit the credentials via: demyx host edit. See Step 6 for more details.
# Install demyx and ping home
bash -c "$(curl -sL https://demyx.sh/install)"

# Install demyx without pinging home
wget https://demyx.sh/install; bash install --no-ping
Step 3. WordPress
Demyx is preconfigured to always use HTTPS. The MOTD the available stacks you can use, for this example, I will be using a regular WordPress install. Don’t know what Bedrock is? Visit their site: https://roots.io/bedrock/.
- —stack=bedrock – WordPress running Root’s Bedrock nginx-php stack
- —stack=nginx-php – WordPress running default stack
- —stack=ols – WordPress running OpenLiteSpeed stack
- —stack=ols-bedrock – WordPress running Root’s Bedrock in OpenLiteSpeed stack
# Creating a regular WordPress site
demyx run demo.demyx.sh

# Creating a Bedrock site
demyx run demo.demyx.sh --stack=bedrock
After the site installs, you will be presented with a table of useful information. To see all of the site’s settings/variables: demyx info demo.demyx.sh.
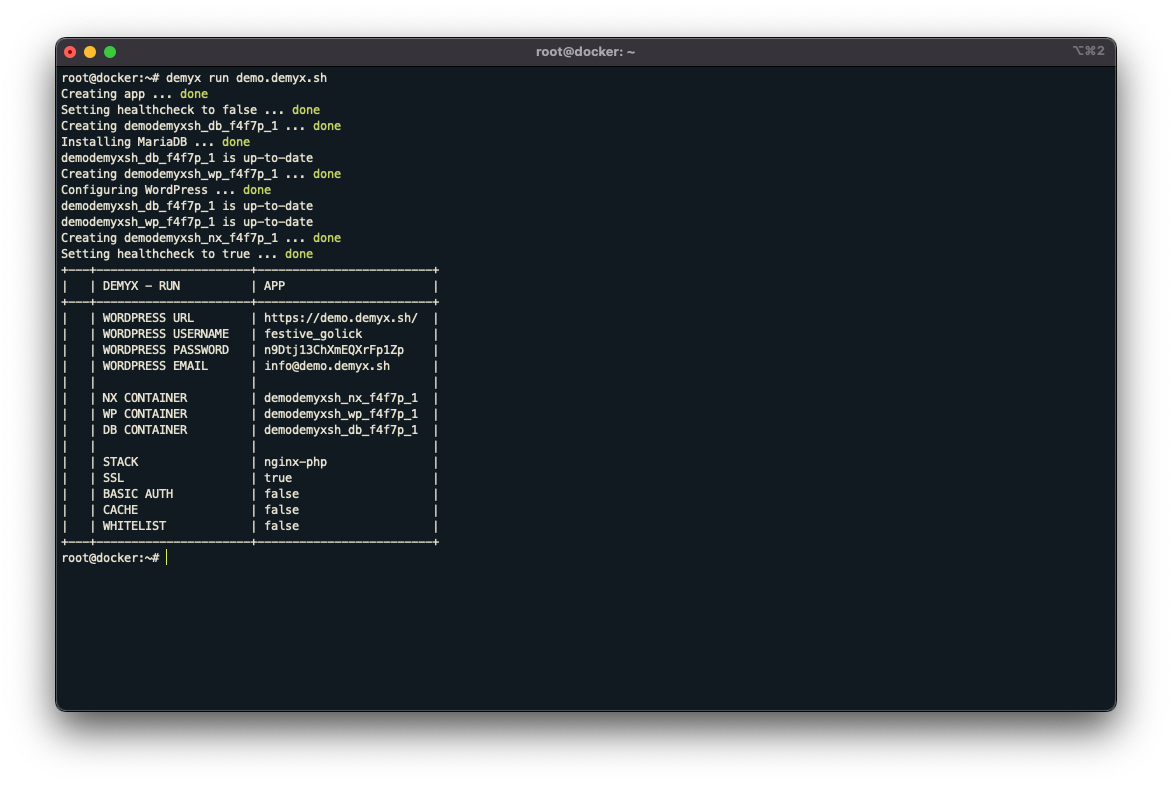
Short information table after site creation
Step 4. Congratulations!
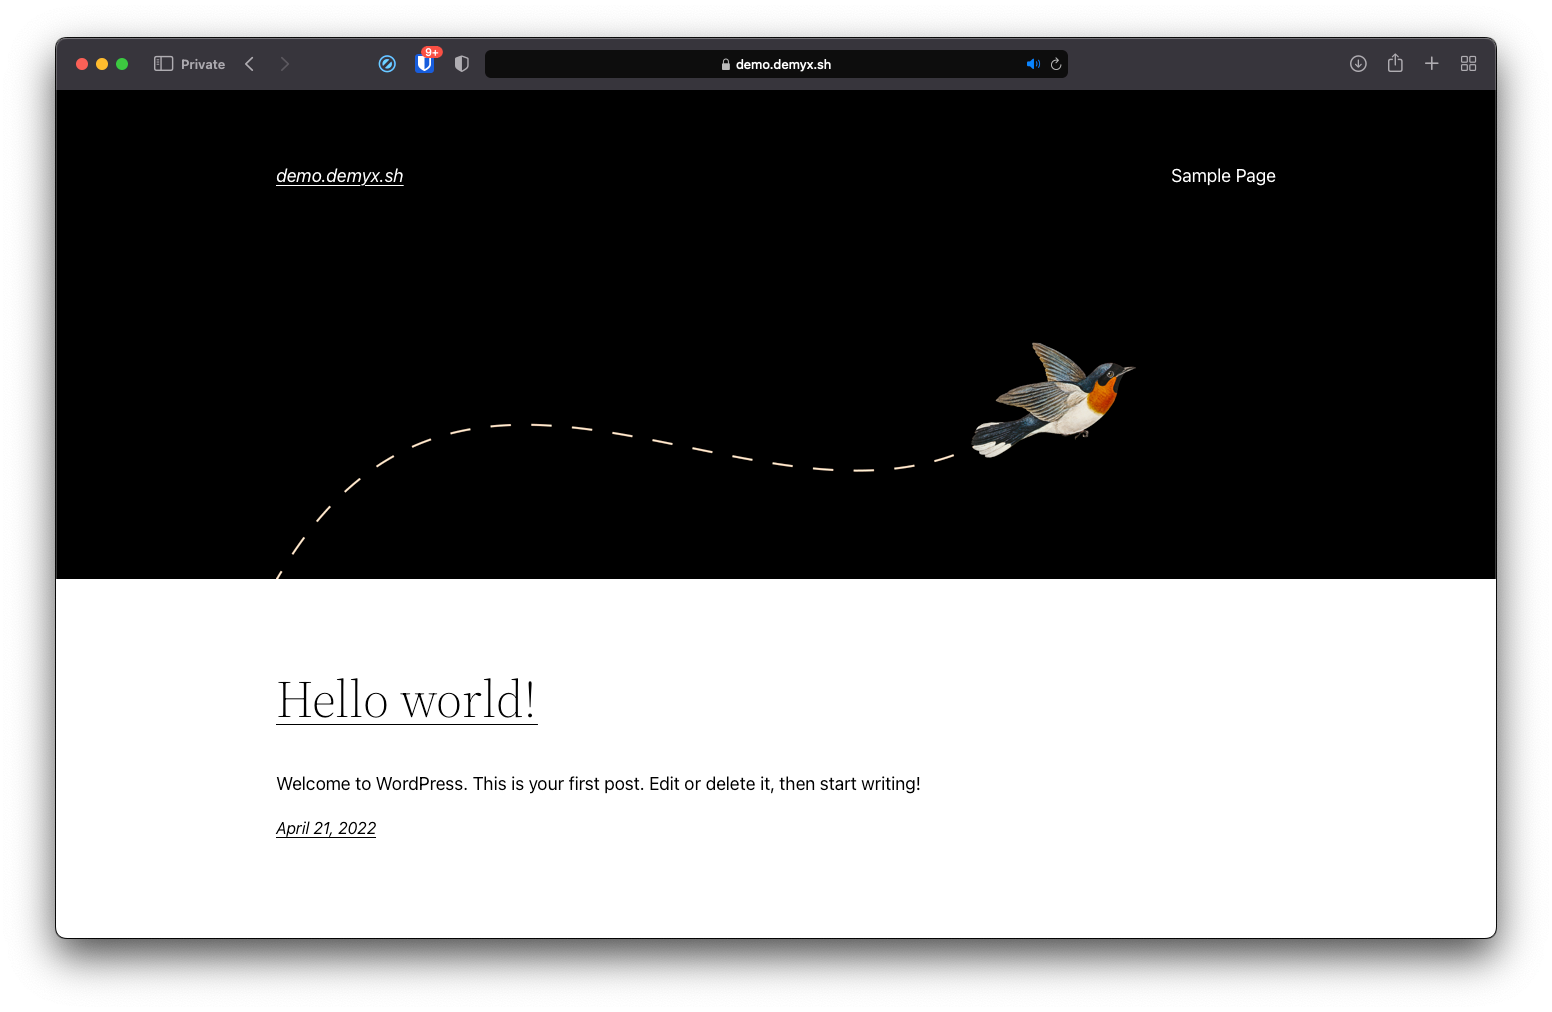
New WordPress site
YAY! You made your first Demyx app! Notice how we didn’t touch a single Docker command? That’s because it was to make my life easier and now it can make yours a little better too!
Step 5. Create more sites

WordPress with IP address as the site URL
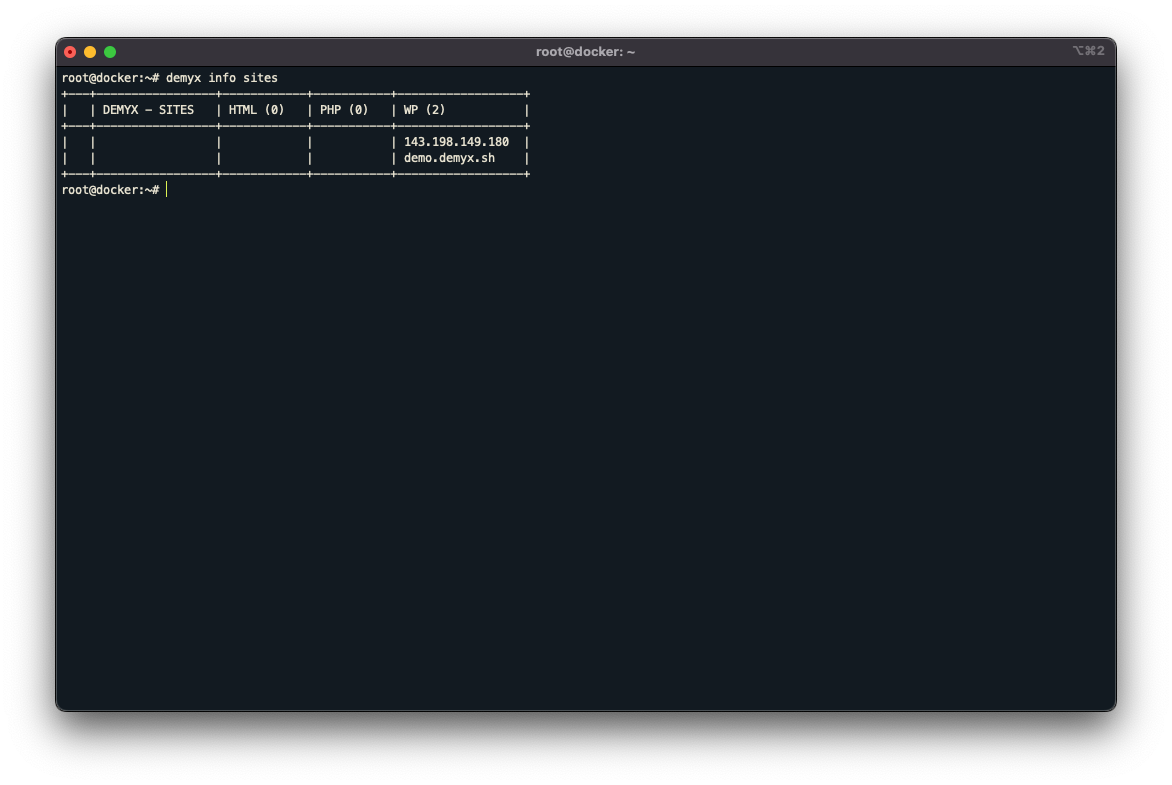
Command: demyx info sites
Step 6. Bonus
But wait, there’s more! Demyx comes packed with features that’s available in the help menu. I will be showing you some notable ones.
Traefik Dashboard
This is disabled by default; during install, it prompted you to enable it. Don’t worry if you set it to false. You can always enable it via demyx host edit; demyx host restart; demyx refresh traefik. Traefik has HTTP auth enabled by default, you can find the credentials in the Demyx config file. Traefik also supports IP whitelisting by changing DEMYX_HOST_IP to your IP then rerun the commands from above, supports multiple IPs by CSV format. You can also change the subdomain of the dashboard.
# demyx host edit
DEMYX_HOST_TRAEFIK_DASHBOARD=true
DEMYX_HOST_TRAEFIK_DASHBOARD_DOMAIN=traefik
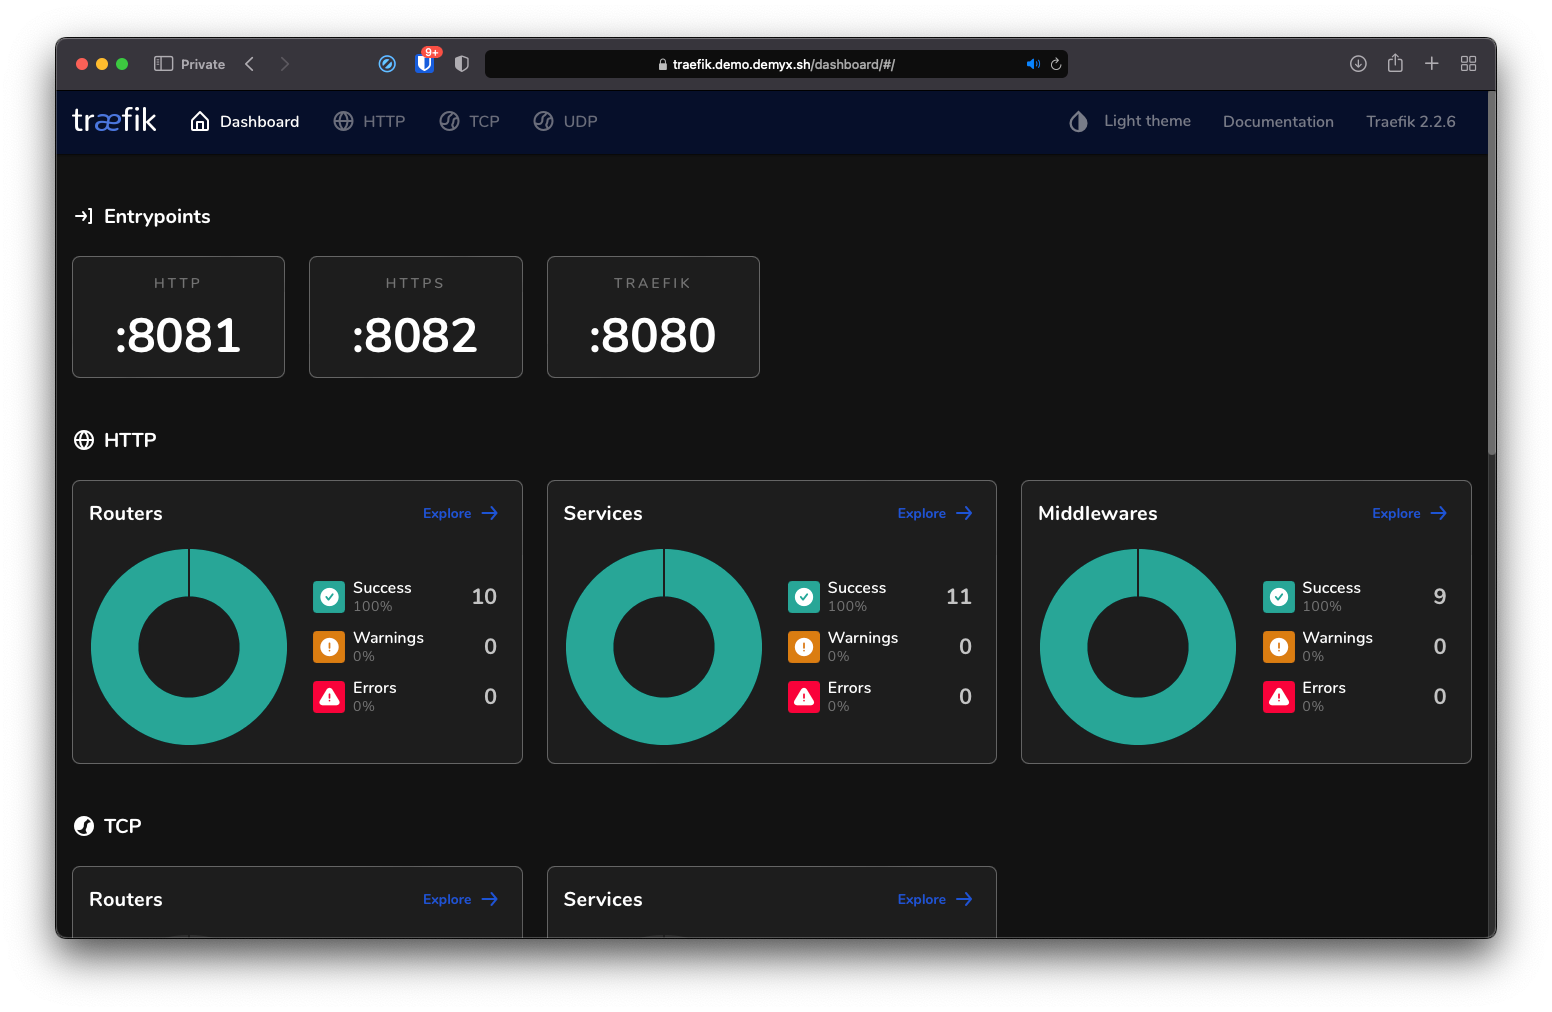
Traefik Dashboard
Demyx Browser
The Demyx file browser is enabled by default, powered by code-server. Just like with Traefik, it supports IP whitelisting. You can disable it, change the subdomain value, and password. See below for variables.
If you do decide to change the generated password, then PLEASE PLEASE PLEASE use a strong password. The file browser has a terminal and it also can execute Docker and Demyx commands.
# demyx host edit
DEMYX_HOST_CODE=true
DEMYX_HOST_CODE_DOMAIN=code
DEMYX_HOST_CODE_PASSWORD=<generated password here>

Demyx Browser
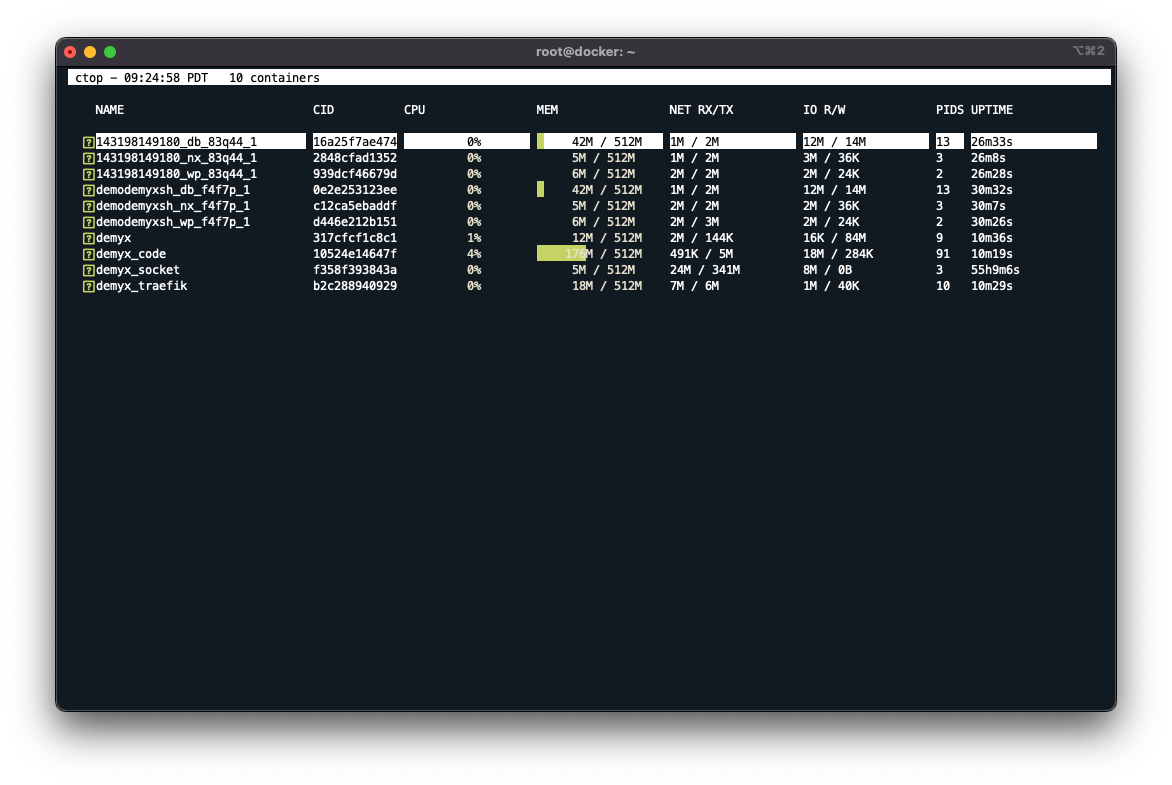
ctop
ctop is htop, but for containers! If you look at the screenshot, you can see all running containers. The ctop binary is included in the Demyx image.
# Execute docker command into demyx
demyx shell ctop
https://ctop.sh
code-server and browser-sync
Demyx has a feature that will turn a WordPress site into development mode. It replaces the current WordPress container with a modified code-server and spins up a browser-sync container. The code-server container has xDebug and WordPress Coding Standard installed to help you during development.
# Enable development mode
demyx config demo.demyx.sh --dev

# Disable development mode
demyx config demo.demyx.sh --dev=false
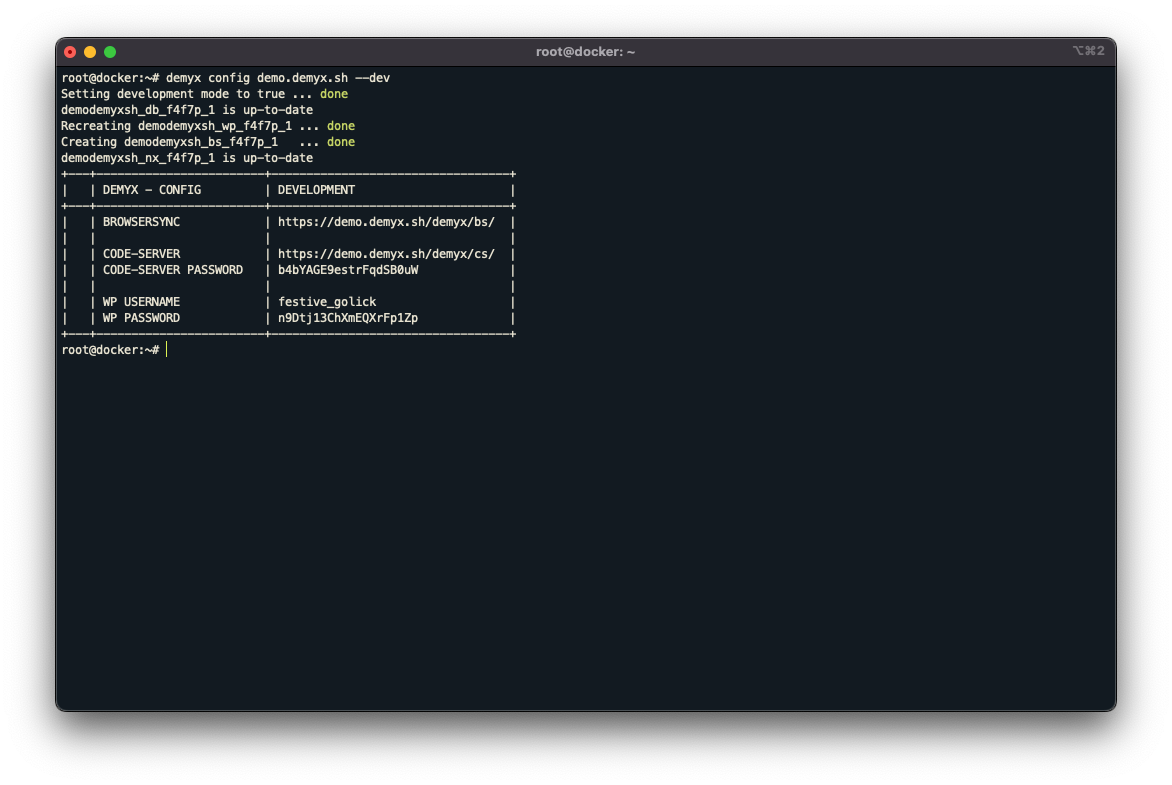
Table showing data for code-server and browser-sync
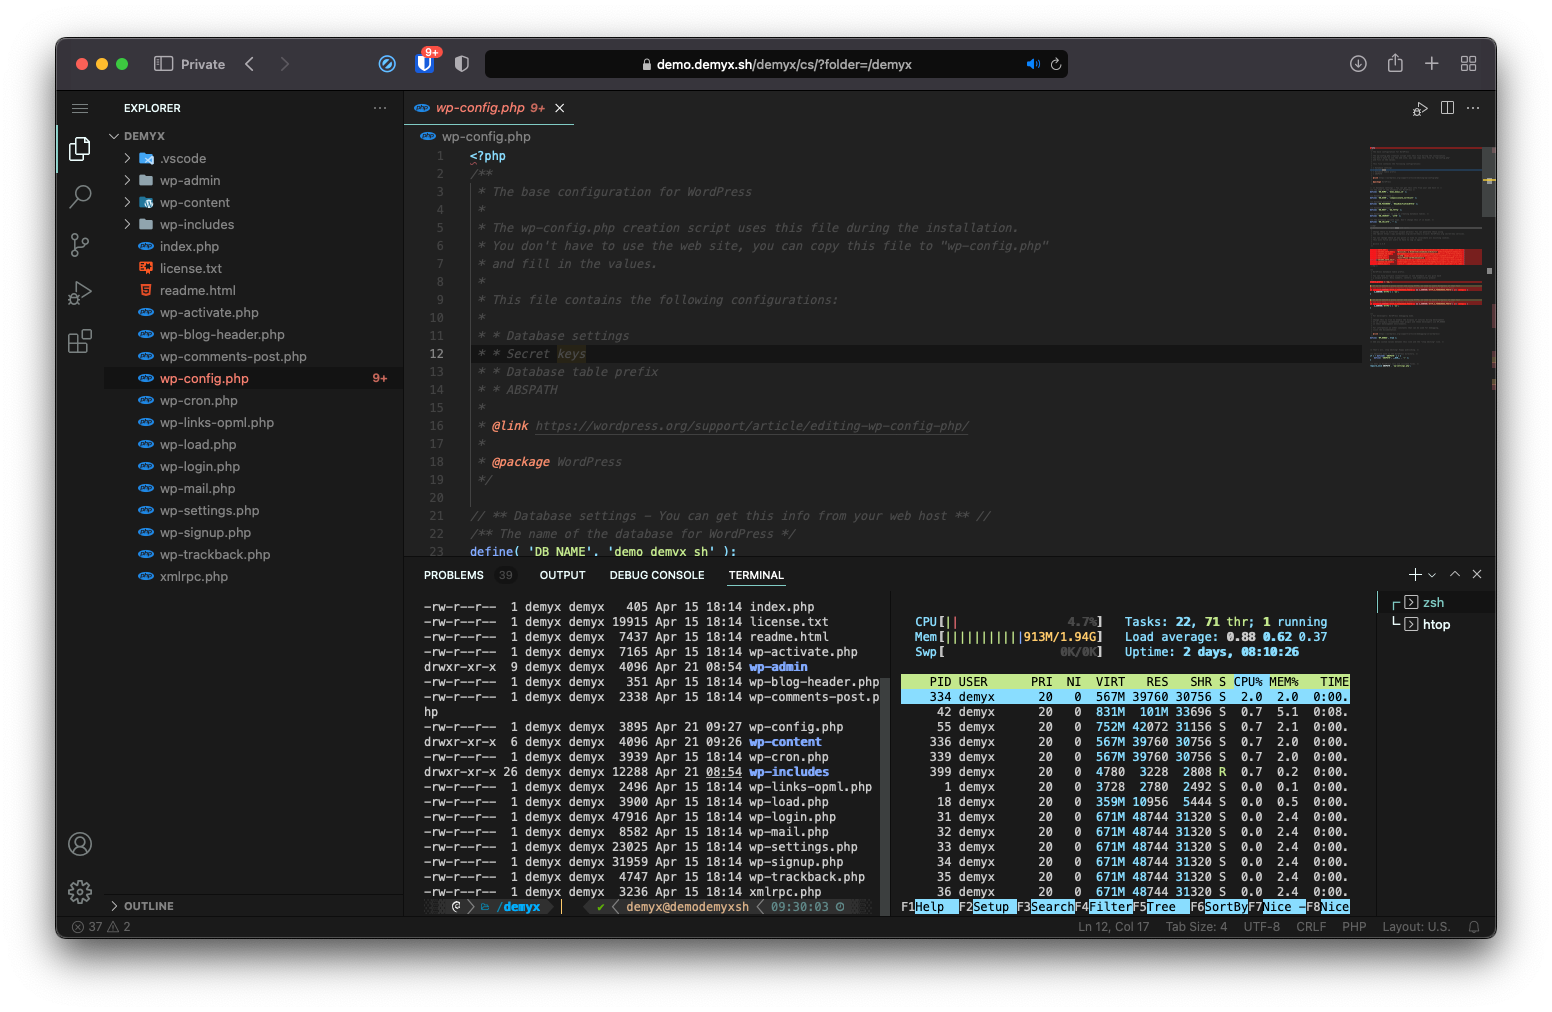
code-server – https://demo.demyx.sh/demyx/cs/
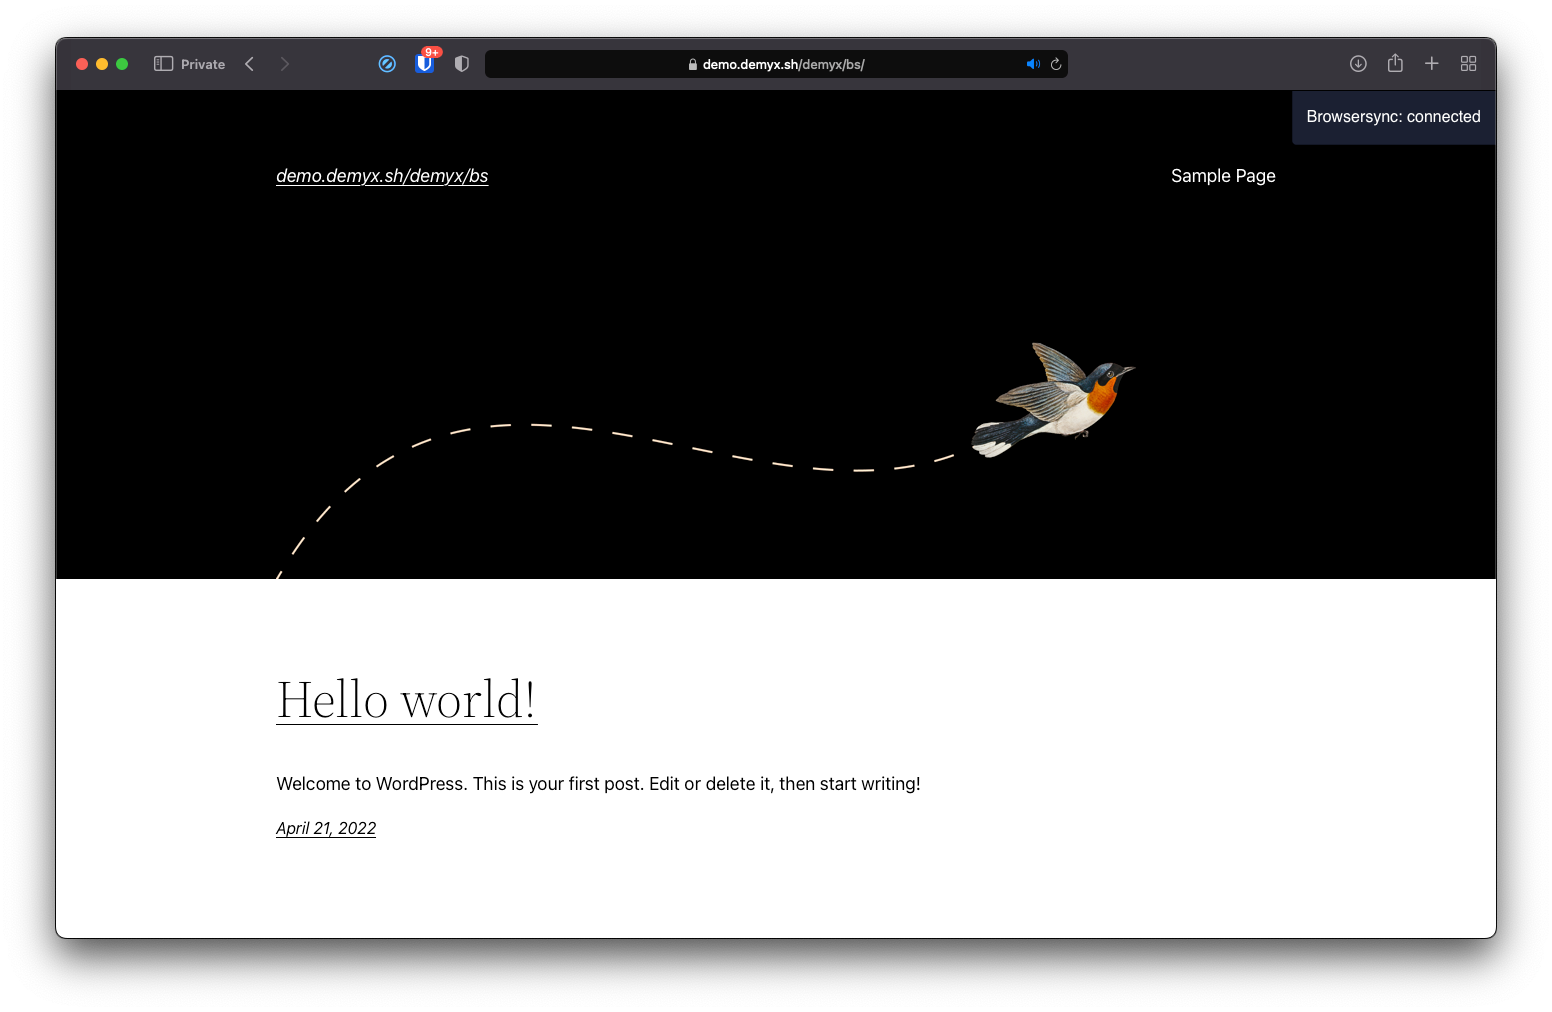
browser-sync – https://demo.demyx.sh/demyx/bs/
phpMyAdmin
Demyx comes shipped with phpMyAdmin that’s auto configured when running.
# Enable phpMyAdmin
demyx config demo.demyx.sh --pma

# Disable phpMyAdmin
demyx config demo.demyx.sh --pma=false
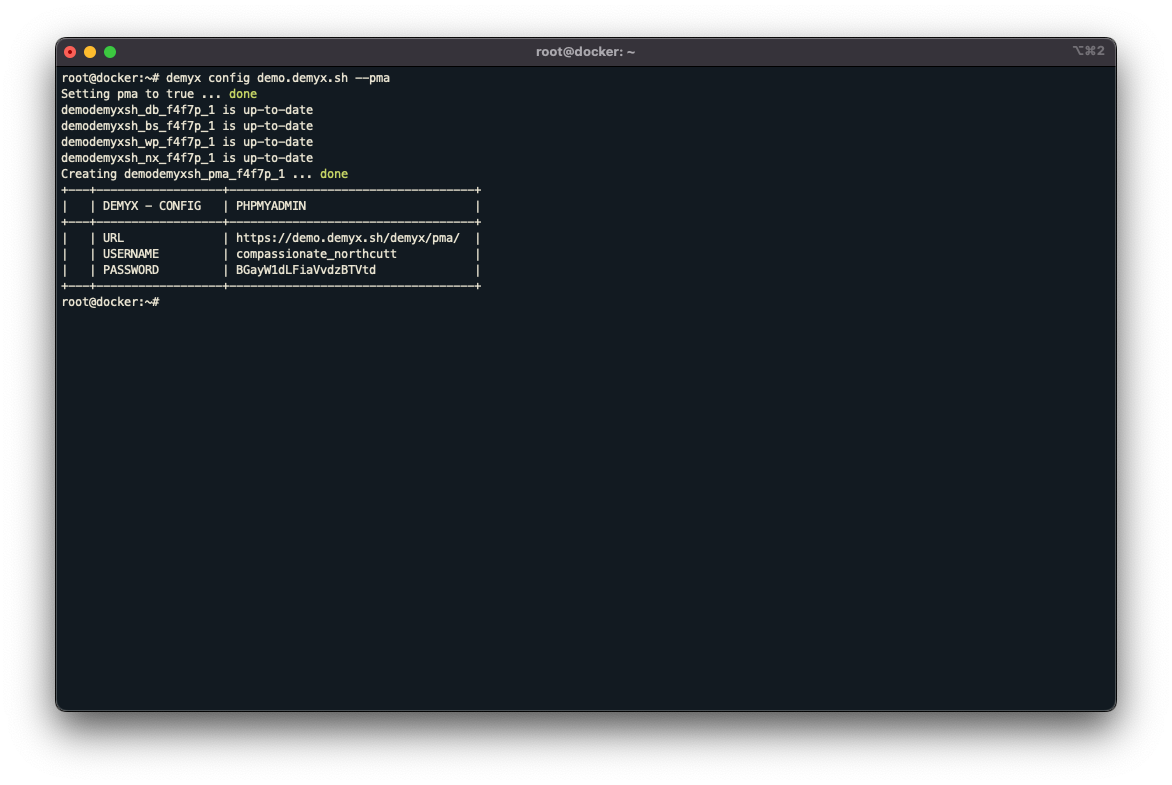
phpMyAdmin credentials
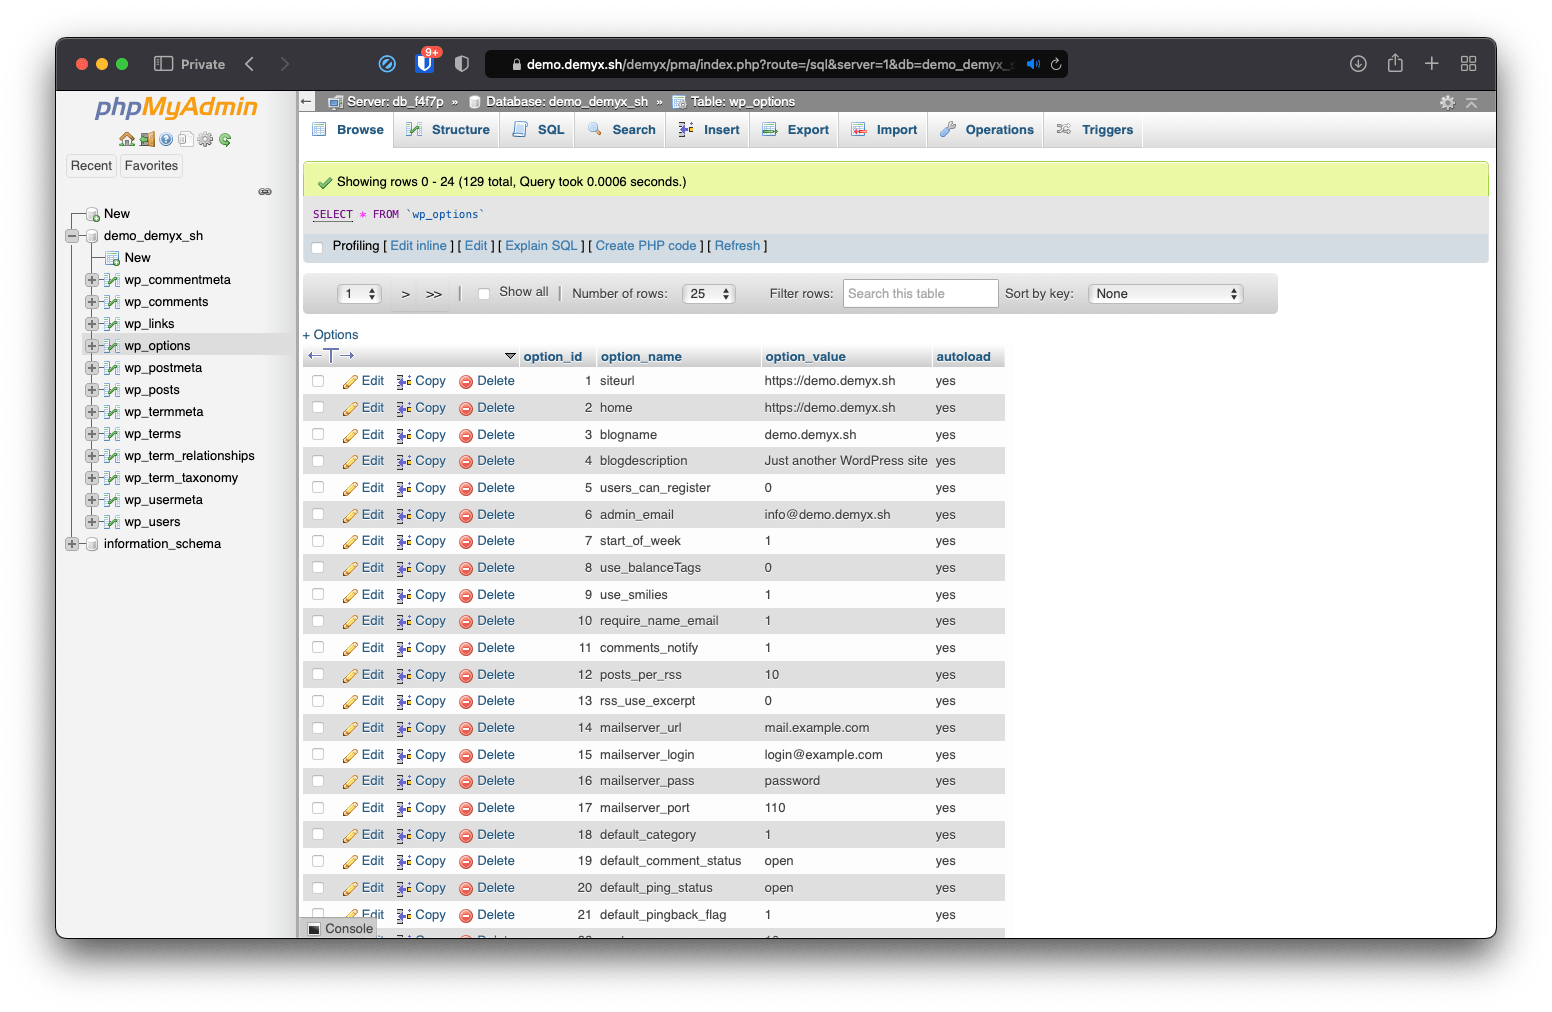
phpMyAdmin interface – https://demyx.sh/demyx/pma/
SFTP
Demyx comes with a preconfigured OpenSSH image that has root and password authentication disabled. Only accessible via public key.
# Enable SFTP
demyx config demo.demyx.sh --sftp

# Disable SFTP
demyx config demo.demyx.sh --sftp=false
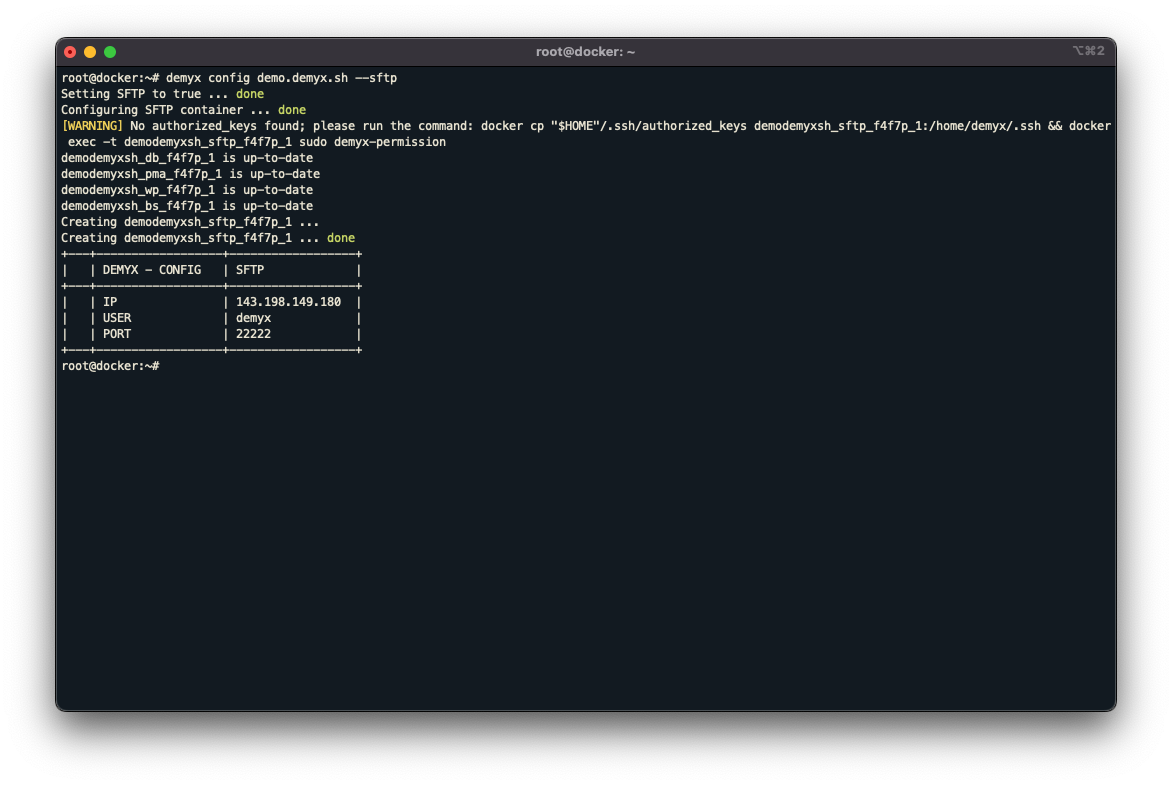
SFTP credentials
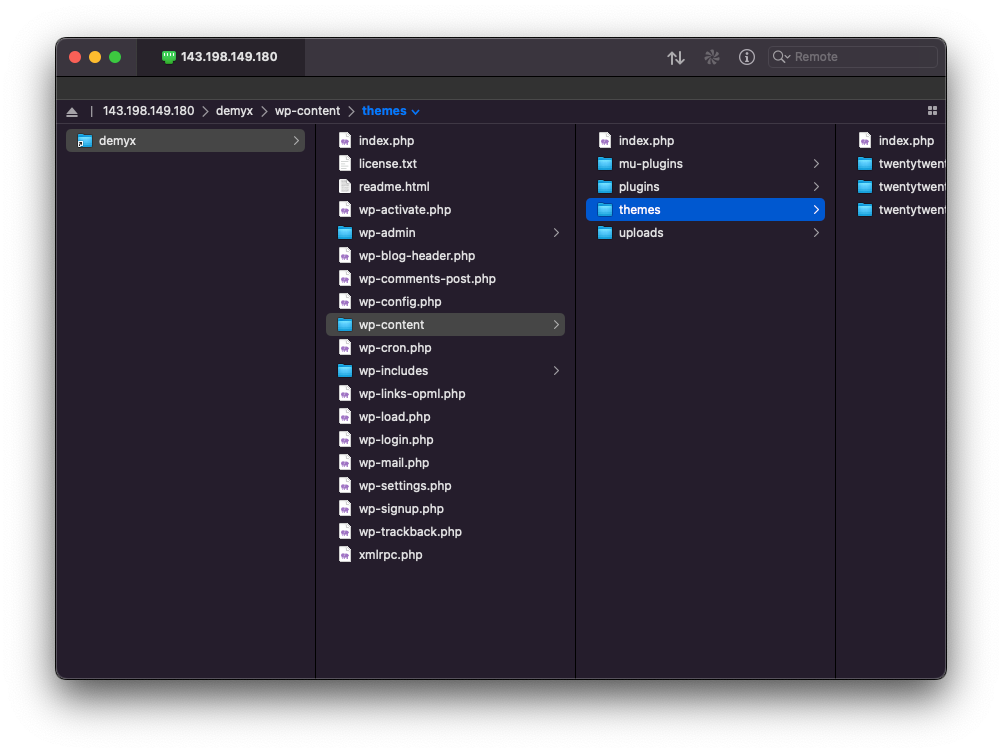
Browse site with SFTP
Step 8. Conclusion
Demyx has a bunch of features that’s too long to list in this article so feel free to explore the help menu. If you have anymore questions, then please come join me in my channel at Freenode: #demyx.
Demyx looks very interesting, I am going to check it on weekend 😉
Do you also consider of adding features like only html site container (I’m a fan of Hugo static) or php+mysql containers?
Hi Arek,
Yes I’m planning to implement support for html/php containers as soon as the commands for WordPress containers are stable. It might happen very soon! I did plan ahead and put the folder structure as a placeholder:
So I tested a script and it is great, in my opinion one of the best for automation of docker and wordpress.
But after a week, when I was trying to add another domain to the server I’m receiving message like this when I type any of demyx command:
“error during connect: Get http://demyx_socket:2375/v1.40/containers/json: dial tcp: lookup demyx_socket on 127.0.0.11:53: no such host”
Do you know what can cause this issue?
Hi, I’ve updated the socket. In the future, you shouldn’t have these issues anymore. Can you run this on the host?
demyx update –system
If that doesn’t work, then feel free to ask for help in real time in my IRC channel: https://webchat.freenode.net/?channel=#demyx
Hi,
saw your post in the roots.io forum and looked through your code in github.
Very nice, good work. Really like your design of your commands and the aspect of bundling tasks.
I’m a big fan of automation scripts and played intensively with ansible for provisioning for quite a while.
Because I looking for something like demyx, I wonder how you manage your developments and realize your deployment strategy. Are you doing your dev work and customizations via code-server directly on the server or do you make your work locally and push/sync it via git oder sftp?
Lookin forward to hear from you.
Hi aarkiin,
Thank you for the compliments! I try to be as neat as I can when coding and commenting 😊. I do everything in code-server and remotely too! I haven’t dev locally on my laptop for a long time now. As for deployment, I wrote my own bash script that chains commands.
#!/bin/bashcd /demyx/web/app/themes/demyx
# Disable module.hot.accept()
sed -i "s|module.hot.accept|//module.hot.accept|g" /demyx/web/app/themes/demyx/resources/assets/scripts/main.js
if [[ "$1" = push ]]; then
git push
else
yarn build:production
# Exit if build fails
if [[ "$?" != 0 ]]; then
echo '############################'
echo '# #'
echo '# BUILD FAILED! #'
echo '# #'
echo '############################'
exit 1
fi
composer install --no-dev
git add .
git commit -m "$1"
git push
composer install
fi
# Enable module.hot.accept()
sed -i "s|//module.hot.accept|module.hot.accept|g" /demyx/web/app/themes/demyx/resources/assets/scripts/main.js
The script is chmoded and then executed via
~/deploy. If I don’t have to compile any css/js then I just commit that single file then~/deploy push, else, it would compile. Here’s my .gitignore:# Include your project-specific ignores in this file# Read about how to use .gitignore: https://help.github.com/articles/ignoring-files
.cache-loader
.editorconfig
.eslintrc.js
.stylelintrc.js
CHANGELOG.md
CODE_OF_CONDUCT.md
LICENSE.md
README.md
phpcs.xml
yarn.lock
composer.json
composer.lock
package-lock.json
package.json
node_modules
npm-debug.log
yarn-error.log
resources/assets
Hi,
Been learning Docker for the past week and what got me into it in the first place was the “dev/prod parity”, which leads me to my question: how do I setup demyx for local development?
I’m really new to Docker so might I also ask if there is a philosophy behind why you would do everything remotely instead? Hoping you could clarify these things for me.
Hi Abe,
Demyx at the moment doesn’t support non SSL setup but that will have to change. The philosophy behind Demyx being SSL first is because I’ve been working remotely for years now on my dev servers. So it made sense to me that SSL has to be priority when working remotely.
Demyx is almost a year old, I started this project with zero knowledge of how Docker worked, so I just kept learning and learning. Once you know how things are structured, you can easily modify Demyx by making custom Dockerfile or modifying the docker-compose.yml. If you’re adventurous enough, you can fork my repo and change the bash scripts.
I hope this clarifies things for you. If not, feel free to reach out to me in the other channels. IRC is probably the effective and fastest way to communicate directly with me.
Intesting project. Does it mean demyx is only suited for wordpress?
can’t be used for other PHP app that’s not wordpress?
Hey thanks for checking my project. At the moment, it’s focused on WordPress for now but there are placeholders I’ve added for HTML and PHP sites. Sorry I’ve missed the opportunity to say hi to you in the #demyx channel; I’m usually online after 7am PST.
Is it possible to setup other dockers with your script?
I’m hoping to install Bitwarden using your script. Is it possible? And what would you suggest be the best way to build such a docker setup with demyx?
Yes of course it’s possible. In one of my servers, I have other Docker images running alongside the demyx stack. Some non-demyx containers running are Rocket Chat, The Lounge, Nextcloud, etc.
All you would need is to use the same demyx network in your docker-compose.yml and the right Traefik labels. Here’s an example of my The Lounge docker-compose.yml:
version: "2.4"

services:

  thelounge:

    container_name: thelounge

    image: demyx/thelounge

    cpus: .5

    mem_limit: 512m

    restart: unless-stopped

    volumes:

      - thelounge:/var/opt/thelounge

    labels:

      - "traefik.enable=true"

      - "traefik.http.routers.thelounge-http.rule=Host(`domain.tld`)"

      - "traefik.http.routers.thelounge-http.entrypoints=http"

      - "traefik.http.routers.thelounge-http.middlewares=thelounge-redirect"

      - "traefik.http.routers.thelounge-https.rule=Host(`domain.tld`)"

      - "traefik.http.routers.thelounge-https.entrypoints=https"

      - "traefik.http.routers.thelounge-https.tls.certresolver=demyx"

      - "traefik.http.middlewares.thelounge-redirect.redirectscheme.scheme=https"

    networks:

      - demyx

volumes:

  thelounge:

    name: thelounge

networks:

  demyx:

    name: demyx
Would it be possible to run demyx as a service on a docker swarm?
Hi Edson,
Unfortunately Demyx wasn’t tested on a swarm environment; feel free to fork it and experiment.
And also, thank you for the coffee!
Hi there,
This is a very interesting project that caught my attention for a simple solution to deploy multiple wp websites using hassle-free docker to orchestrate containerisation of each webapp. I have not any similar projects with the functionality and implementations of services that make the whole deployment more manageable and easy to monitor.
I have a question/problem which is not letting me able to adopt this system completely. Please help me with the following:
How do you handle multiple websites on a single IP? I am able to only create and access websites created via using the ip address of the host machine. I am not able to access any sites via defining a hostname. How do you point DNS to hostname to multiple different wordpress on the same IP? If I run ‘demyx run bedrocks.test –stack=ols-bedrock’ the process of creation and running the container completes, however I am not able to access the website at bedrocks.test. I have installed demyx on a proxmox/vmware debian server inside my home lab. I would migrate to developing on the cloud but I’m not sure how to handle multiple domains and subdomains. How does traefik fit into all this?
In principle installing demyx on a server from cloud platforms like Digital Ocean should be the same as installing demyx on a local server in home lab.
Let me know how I can better understand this.
Best,
Mehul
Hi Mehul,
Let me answer some of your questions.
– How do you handle multiple websites on a single IP?
You would have to use a reverse proxy service like Traefik, which Demyx is currently setup for.
– How do you point DNS to hostname to multiple different wordpress on the same IP?
Same answer as the question before.
– I have installed demyx on a proxmox/vmware debian server inside my home lab. I would migrate to developing on the cloud but I’m not sure how to handle multiple domains and subdomains. How does traefik fit into all this?
Demyx is currently configured for actual remote KVMs. Demyx in a local environment is currently not supported but feel free to modify it since it’s open source.
Hello ! Just in case I’m not the only one interested, I had some hard time modifying php post_max_size parameter (although creating a website with demyx was initially amazingly easy – thank you so much for this tool).
I finally managed to do it, here is the procedure :
In the CLI (on the machin where demyx was installed), use :
demyx edit SITENAME
Then all you have to do is change the value DEMYX_APP_UPLOAD_LIMIT. This will change the required parameters in php.ini, including post_max_size, as soon as you “refresh” your website, using demyx refresh SITENAME
Yes that’s correct. The site’s container will be recreated.
I have some queries when my domain comes from cloudflare does not aceta sends a page error not registered on the other hand in my case I am using a multi site configuration in your domain and I can not access my south domain you can help me with that.
Run: demyx log traefik -e
Paste here or email to [email protected]
how can i add this extension
Sorry, PhastPress requires a PHP extension that is not installed.
The PDO extension needs to be installed with the SQLite3 database driver available.
Currently we’re getting this error: could not find driver
Ask your hosting provider to install the PDO_SQLITE extension, or downgrade to PhastPress 2.1.
Hi, you can clone my WordPress repo and modify the Dockerfile redirectly then build the image in that server then demyx compose up the affected site.